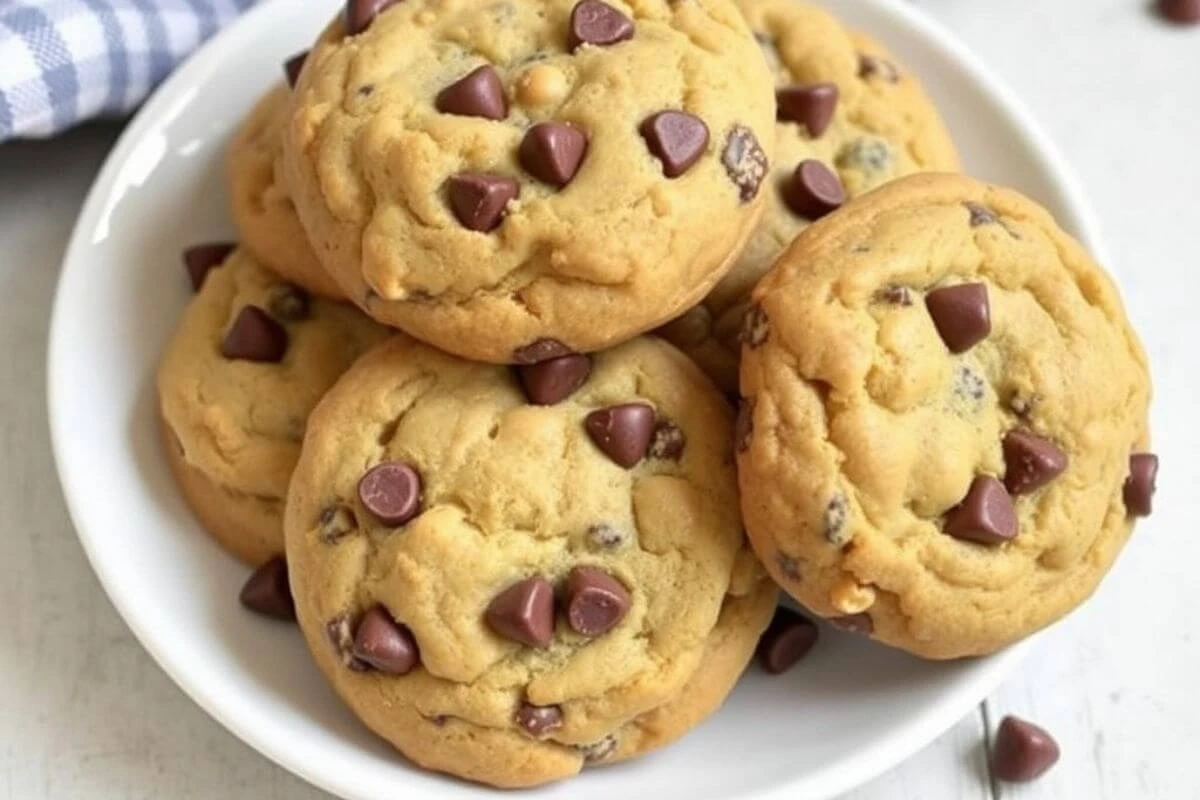
There’s something magical about recreating a little piece of Disney at home, and what better way to do it than with their iconic chocolate chip cookie recipe? Known for their perfect balance of chewy centers and crisp edges, these cookies are a fan favorite in Disney Parks. But if you’ve ever struggled with converting recipes to metric measurements, you’re not alone! Baking is an art that thrives on precision, and using metric measurements ensures your cookies turn out just like the ones you remember from Disney.
In this blog post, we’ll guide you through the exact metric measurements needed to whip up these delightful treats. Whether you’re a Disney enthusiast or a baking aficionado, this step-by-step guide will help you achieve perfection in every bite. So grab your measuring scales, and let’s bring a touch of Disney magic to your kitchen!
Why Disney’s Chocolate Chip Cookie Recipe Is a Fan Favorite
1. The Disney Magic in Every Bite
There’s a special kind of nostalgia that comes with Disney treats, and their chocolate chip cookies are no exception. These cookies are more than just a dessert; they’re a way to relive the magic of Disney Parks, right from the comfort of your home.
Every bite of these cookies is a delightful reminder of the joy and wonder that Disney brings. Whether you’ve experienced them fresh from a bakery on Main Street, U.S.A., or as part of a magical day filled with rides and parades, the flavor and aroma of these cookies are unmistakable. Recreating them at home is like bottling a little piece of Disney magic, perfect for any occasion.
What makes these cookies so special isn’t just the recipe but the experience they represent. The buttery, chocolatey aroma filling your kitchen as you bake is enough to transport you back to the happiest place on Earth. Pair that with their irresistible texture (chewy in the center), with a slight crunch on the edges, and you’ve got a recipe that brings smiles to kids and adults alike.
Sharing these cookies with family and friends can make any day feel like a celebration. They’re perfect for birthdays, movie nights, or just as a sweet pick-me-up after a long day. Baking them is also a fantastic way to introduce children to cooking, making the process as magical as the result.
So, when you sink your teeth into one of these cookies, you’re not just enjoying a delicious treat; you’re savoring a moment of Disney’s timeless charm and unforgettable magic.
2. Perfect for Family and Friends
Disney’s chocolate chip cookie recipe isn’t just about creating a delicious treat, it’s about bringing people together. These cookies have a way of sparking joy, making them the perfect addition to family gatherings, celebrations, or even quiet evenings at home.
A Recipe for Togetherness
Baking these cookies can be a delightful group activity. Whether you’re baking with kids, a partner, or friends, the process of measuring ingredients, mixing dough, and sneaking a few chocolate chips creates lasting memories. For children, it’s an exciting way to learn basic kitchen skills while experiencing the magic of making something they love from scratch.
Perfect for Every Occasion
The versatility of these cookies makes them ideal for almost any occasion. Hosting a family game night? These cookies are a crowd-pleasing snack. Planning a birthday party? Serve them as a classic dessert option or package them as take-home treats. Even for everyday moments, like a rainy afternoon or a weekend baking session, these cookies bring warmth and comfort to the table.
A Thoughtful Homemade Gift
Nothing says “I care” like a batch of homemade cookies. Pack these Disney chocolate chip cookies in decorative tins or boxes, and they become a heartfelt gift for friends, neighbors, or teachers. The effort of baking from scratch, combined with the nostalgia of a Disney-inspired recipe, makes them a truly special present.
Creating Connections Through Flavor
Food has a unique way of connecting people, and these cookies are no exception. Sharing a plate of freshly baked cookies can spark conversations, laughter, and cherished moments. For families, it’s a way to bond over a shared love for Disney or baking. For friends, it’s an opportunity to reminisce about trips to Disney Parks or dream about future visits.
Whether you’re making these cookies to share or to enjoy together, they have a way of turning ordinary moments into extraordinary memories, reminding us all of the joy of coming together over something as simple and wonderful as a cookie.
3. The Appeal of Homemade Disney Treats
There’s something undeniably magical about bringing a taste of Disney into your own kitchen. While visiting the Disney Parks is an experience filled with wonder and joy, recreating their beloved treats at home allows you to hold onto that magic and share it with others, anytime you like.
A Touch of Disney Magic at Home
Homemade Disney treats, like their iconic chocolate chip cookies, let you relive the enchantment of Disney without the need for a plane ticket. The simple act of baking these cookies can instantly transport you to Main Street, U.S.A., or remind you of that moment when you first tasted them at the park. It’s a way to infuse a bit of Disney’s charm into your everyday life.
Customizable and Accessible
Making Disney treats at home means you can adjust them to suit your preferences. Whether you’re catering to dietary restrictions, like gluten-free or dairy-free options, or simply prefer extra chocolate chips, homemade recipes allow for endless customization. You get to enjoy all the deliciousness of Disney’s treats while tailoring them to your family’s tastes and needs.
Cost-Effective Disney Magic
Visiting Disney Parks is a dream for many, but it can also be expensive. Recreating Disney recipes at home offers an affordable way to enjoy a piece of the magic. The ingredients for these chocolate chip cookies are simple and easily accessible, making it a cost-effective way to indulge in a little Disney nostalgia.
Perfect for Celebrations and Everyday Joy
Homemade Disney treats can make any day feel like a celebration. Whether you’re hosting a Disney-themed birthday party, watching your favorite Disney movie, or just looking for a way to make a regular afternoon special, baking these cookies adds a magical touch. They’re also a fantastic conversation starter for gatherings, especially among fellow Disney fans.
Nostalgia in Every Bite
There’s a strong sense of nostalgia tied to Disney’s iconic treats. Baking these cookies at home brings back memories of family vacations, joyful moments at the parks, and the excitement of exploring Disney’s many wonders. It’s a way to relive those happy times and share them with loved ones, creating new memories along the way.
By recreating Disney’s chocolate chip cookies at home, you’re not just making a dessert, you’re bringing a bit of Disney’s timeless magic into your everyday life. It’s a sweet reminder that the joy and wonder of Disney can be felt wherever you are, one delicious bite at a time.
Essential Ingredients for Disney Chocolate Chip Cookies (Metric Version)
1. Overview of Metric Measurements
Metric measurements are the gold standard for precision in baking, and for good reason. Unlike the imperial system, which relies on cups and spoons that can vary slightly in volume, the metric system uses grams and milliliters for exact measurements. When it comes to baking (where even small deviations can affect the outcome), this level of precision is key to creating consistent, delicious results, especially with a recipe as iconic as Disney’s chocolate chip cookies.
Why Metric Measurements Matter in Baking
Baking is more science than art, and the balance of ingredients is critical to achieving the perfect texture and flavor. Using metric measurements ensures that you’re adding the exact amount of each ingredient, whether it’s flour, sugar, butter, or chocolate chips. This is especially important in a recipe like Disney’s cookies, where the balance between chewy and crispy depends on precise ratios.
The Advantages of the Metric System
- Accuracy: Measuring in grams and milliliters eliminates the guesswork involved in using cups, which can differ in size and packing density.
- Consistency: Metric measurements allow you to replicate the recipe perfectly every time, ensuring consistent results.
- Ease of Scaling: Whether you’re halving the recipe for a small batch or doubling it for a party, metric measurements make scaling straightforward and error-free.
- Global Standard: Since most countries use the metric system, it makes recipes accessible and easy to follow for a worldwide audience.
How to Use Metric Measurements in Baking
- Weighing Ingredients: Invest in a digital kitchen scale to weigh dry ingredients like flour and sugar. Scales provide precise readings and are more reliable than measuring cups.
- Measuring Liquids: Use a liquid measuring jug marked in milliliters for wet ingredients like milk or melted butter.
- Understanding Conversions: If you’re converting an imperial recipe to metric, know that 1 cup of flour is approximately 120 grams, and 1 cup of sugar is about 200 grams. A quick online conversion tool can also be handy.
Metric Baking in Disney’s Chocolate Chip Cookie Recipe
The Disney chocolate chip cookie recipe shines when made using metric measurements. Each ingredient, from the butter to the chocolate chips, is perfectly portioned to create the ideal cookie texture. By following the recipe with precise metric measurements, you’ll ensure the cookies turn out just as magical as the ones served in the parks.
Tips for Beginners
- Start with small batches to get comfortable using metric measurements.
- Always zero out your scale before adding a new ingredient to ensure accuracy.
- Remember that practice makes perfect soon, measuring ingredients in grams and milliliters will feel second nature.
By embracing metric measurements, you’re not only ensuring the success of your Disney chocolate chip cookies but also stepping into a world of precision and ease that will elevate your baking game for years to come.
2. List of Ingredients
The foundation of any great recipe lies in the quality and balance of its ingredients, and Disney’s chocolate chip cookie recipe is no exception. Using fresh, high-quality ingredients measured precisely in metric units ensures that every batch of cookies comes out just right. Below, we’ll dive into each ingredient, its role in the recipe, and tips for selecting the best options to make your cookies magical.
Flour (All-Purpose, 250g)
Flour forms the backbone of your cookie dough, providing structure and texture. All-purpose flour is ideal for this recipe as it strikes the perfect balance between softness and strength. For best results:
- Use fresh flour: Check the expiration date to avoid a stale taste.
- Sift the flour: This removes lumps and ensures even mixing.
Butter (Unsalted, 170g)
Butter adds richness and flavor while helping create the signature chewy texture. Unsalted butter is preferred because it lets you control the salt level in the recipe.
- Room temperature: Let the butter soften before mixing to ensure smooth blending with sugar.
- High-quality butter: European-style butter, with its higher fat content, can elevate the flavor.
Sugar (White, 150g & Brown, 130g)
The combination of white and brown sugar is key to achieving the perfect cookie texture.
- White sugar: Adds sweetness and helps create the crispy edges.
- Brown sugar: Adds a deeper flavor and contributes to the chewy center. Opt for light brown sugar for a milder flavor or dark brown sugar for a more robust taste.
Eggs (2 Large)
Eggs act as a binding agent, bringing the dough together and adding moisture. Use large eggs for consistency.
- Room temperature: Warm eggs mix more evenly into the batter. To quickly bring eggs to room temperature, place them in warm water for a few minutes.
Vanilla Extract (5ml)
Vanilla enhances the overall flavor, adding warmth and a hint of sweetness to the cookies. Use pure vanilla extract for the best results, as artificial versions can leave a chemical aftertaste.
Baking Soda (5g)
Baking soda is essential for leavening, helping the cookies rise slightly and spread evenly. Be sure to measure it precisely, as too much can result in a bitter taste.
Salt (3g)
Salt balances the sweetness of the sugar and enhances the flavor of the other ingredients. A fine sea salt works best for even distribution throughout the dough.
Chocolate Chips (300g)
The star of the recipe, chocolate chips provide bursts of gooey chocolate in every bite.
- Semi-sweet chocolate: Offers a balance of sweet and rich flavors.
- High-quality chocolate: Look for chips with a cocoa content of at least 60% for the best flavor.
- Mix it up: Try combining semi-sweet, milk, and dark chocolate chips for added complexity.
Optional Add-Ins
While the classic recipe is perfect as is, you can get creative with these optional additions:
- Chopped nuts (50g): Walnuts or pecans add crunch and a nutty flavor.
- Caramel bits (50g): For a sweet, gooey twist.
- Sea salt flakes: Sprinkle on top before baking for a salted chocolate flavor.
By gathering these carefully measured and selected ingredients, you’re setting yourself up for success. Whether you stick to the classic recipe or experiment with add-ins, every ingredient plays a role in creating the delicious magic of Disney’s chocolate chip cookies.
3. Tips for Ingredient Substitutions
Baking Disney’s chocolate chip cookies is a magical experience, but sometimes you might need to make adjustments to the ingredients due to dietary preferences, allergies, or simply running out of an item. Thankfully, there are plenty of substitutions that can help you maintain the cookies’ delicious flavor and texture while accommodating your needs. Below, we explore creative and effective ingredient swaps for common situations.
1. Flour Substitutions
- Gluten-Free Option: Replace all-purpose flour with a 1:1 gluten-free baking flour blend. These blends are specially formulated to mimic the structure and texture of regular flour, ensuring your cookies hold together without becoming crumbly.
- Whole Wheat Flour: For a healthier twist, use whole wheat flour in place of all-purpose flour. Use slightly less (about 225g) as whole wheat flour is denser and absorbs more moisture.
2. Butter Substitutions
- Plant-Based Butter: For a dairy-free option, use vegan or plant-based butter. Look for varieties with a high-fat content to replicate the creaminess of regular butter.
- Coconut Oil: Substitute butter with solid coconut oil (use the same amount, 170g). It will add a slight coconut flavor, which pairs wonderfully with chocolate.
- Applesauce: For a lower-fat alternative, replace half the butter with unsweetened applesauce. This keeps the cookies moist but slightly alters the texture.
3. Sugar Substitutions
- Coconut Sugar: Swap white and brown sugar with coconut sugar for a natural sweetener that has a caramel-like flavor. Use the same amounts as listed in the recipe.
- Honey or Maple Syrup: For a refined sugar-free version, replace sugar with honey or maple syrup. Reduce the amount slightly (about 250g total) and adjust the flour to compensate for the added liquid.
- Monk Fruit Sweetener: For a low-carb or keto-friendly option, use monk fruit sweetener in place of sugar. Follow the manufacturer’s guidelines for equivalent measurements.
4. Egg Substitutions
- Flaxseed or Chia Egg: Mix 1 tablespoon of ground flaxseed or chia seeds with 3 tablespoons of water to replace one egg. Let it sit for 5 minutes to form a gel-like consistency. This works well for vegans or those with egg allergies.
- Unsweetened Yogurt: Use 60g of unsweetened yogurt to replace each egg for a moist texture.
- Mashed Banana: Replace one egg with 1/4 cup of mashed ripe banana. Note that this will add a slight banana flavor to your cookies.
5. Chocolate Chip Substitutions
- Dairy-Free Chocolate Chips: Use dairy-free or vegan chocolate chips for a lactose-free option.
- Chopped Chocolate Bars: If you’re out of chips, chop a bar of semi-sweet, milk, or dark chocolate into small chunks.
- Carob Chips: A caffeine-free alternative to chocolate with a naturally sweet flavor.
6. Vanilla Extract Substitutions
- Almond Extract: Use almond extract for a nutty, slightly sweet alternative. Reduce the amount to 2-3ml, as almond extract has a stronger flavor.
- Maple Syrup: Add 5ml of pure maple syrup for a subtle sweetness in place of vanilla extract.
7. Baking Soda Substitutions
- Baking Powder: If you’re out of baking soda, use 3 teaspoons of baking powder as a substitute. Note that baking powder may cause the cookies to rise more and spread less.
8. Salt Substitutions
- Sea Salt or Kosher Salt: If you don’t have table salt, use an equivalent amount of fine sea salt or kosher salt. For larger flakes, measure slightly less to avoid over-salting.
Tips for Success with Substitutions
- Test in Small Batches: When trying a new substitution, bake a smaller batch to see how the texture and flavor are affected.
- Combine Substitutions Wisely: Some substitutions, like replacing both butter and eggs, may significantly change the cookie’s texture. Consider combining adjustments with care.
- Adjust Baking Time: Some swaps, especially liquid-based ones, might require slightly longer or shorter baking times. Keep an eye on your cookies in the oven.
By using these substitutions, you can adapt Disney’s chocolate chip cookie recipe to suit nearly any dietary preference or ingredient availability while keeping the magic intact.
Step-by-Step Guide to Making Disney Chocolate Chip Cookies
1. Preparation and Tools
Baking Disney’s chocolate chip cookies at home is a fun and rewarding experience, but having the right preparation and tools can make the process smooth and enjoyable. Ensuring you have everything you need before starting will help you avoid interruptions and produce cookies that are as magical as those found in Disney Parks.
Preparation: Setting the Stage for Success
- Read the Recipe: Before starting, read through the entire recipe to familiarize yourself with the steps and ensure you understand the process.
- Gather Ingredients: Measure out all your ingredients in advance and place them in small bowls. This technique, called “mise en place,” saves time and reduces stress.
- Preheat the Oven: Set your oven to the specified temperature (usually 180°C or 350°F) before you start mixing. A properly preheated oven ensures even baking.
- Line Baking Trays: Use parchment paper or silicone baking mats to line your baking trays. This prevents sticking and ensures easy cleanup.
- Soften Butter: Take the butter out of the fridge ahead of time to bring it to room temperature. Softened butter mixes more easily, creating a smoother dough.
- Prepare Mixing Area: Clear a clean, spacious area for mixing ingredients and rolling dough. Have paper towels or a damp cloth nearby for quick cleanup.
Essential Tools for Disney’s Chocolate Chip Cookie Recipe
Having the right tools ensures precise measurements, consistent results, and an enjoyable baking process. Here’s a list of must-haves:
- Digital Kitchen Scale
- Ensures precise measurement of ingredients in grams.
- Vital for metric recipes to maintain accuracy and consistency.
- Measuring Cups and Spoons
- Though the recipe uses metric measurements, a set of measuring spoons is still handy for small quantities like vanilla extract or baking soda.
- Mixing Bowls
- At least two bowls: one for wet ingredients and another for dry ingredients. Use medium or large bowls to prevent spills while mixing.
- Electric Mixer or Whisk
- A handheld or stand mixer speeds up creaming butter and sugar. If you don’t have one, a sturdy whisk and some elbow grease will work.
- Spatula or Wooden Spoon
- For scraping down the sides of the bowl and folding in chocolate chips without overmixing.
- Baking Trays
- Sturdy, flat baking trays ensure even heat distribution. Use two trays to rotate them halfway through baking for uniform results.
- Silicone Baking Mats or Parchment Paper
- Prevent cookies from sticking and make cleanup a breeze. Silicone mats are reusable and eco-friendly.
- Cooling Rack
- Allows cookies to cool evenly, maintaining their texture and preventing sogginess on the bottom.
- Cookie Scoop or Tablespoon
- Ensures evenly sized cookies, which bake consistently and look professional.
- Rolling Pin (Optional)
- If you’re making variations, like cookie sandwiches, a rolling pin can help flatten dough evenly.
Optional Tools for Enhanced Baking
- Thermometer
- To check your oven’s accuracy; many ovens run hotter or cooler than the set temperature.
- Food Processor
- For chopping nuts or making add-ins like oatmeal powder for texture variations.
- Decorating Tools
- If you want to add a creative touch, icing bags or decorative tools can help make themed cookies.
Preparation Tips for Success
- Room Temperature Ingredients: Ensure eggs, butter, and other refrigerated items are at room temperature for easier mixing and better incorporation.
- Organize Workflows: Group tools and ingredients by their use (e.g., all dry ingredients in one section, wet ingredients in another) for smoother progress.
- Stay Clean and Tidy: Keep a damp cloth nearby for spills, and clean as you go to avoid overwhelming messes.
By taking the time to prepare and gather the right tools, you’ll set yourself up for a seamless baking experience. With everything in place, you can focus on the joy of creating your Disney-inspired cookies and enjoy every magical step along the way.
2. Mixing the Dough
Mixing the dough is where the magic of Disney’s chocolate chip cookies truly begins. This step combines the individual ingredients into a harmonious blend, setting the stage for the perfect cookie texture: chewy in the center, slightly crispy on the edges, and bursting with chocolatey goodness. Proper technique during this phase ensures your cookies bake evenly and taste delicious. Let’s break it down into easy-to-follow steps.
1. Creaming Butter and Sugars
The creaming process is a cornerstone of cookie-making, as it determines the texture and structure of your cookies.
- Add Butter: Place softened, unsalted butter (170g) into a large mixing bowl. Softened butter is easier to mix and helps trap air, creating a light and fluffy dough.
- Add Sugars: Combine the butter with white sugar (150g) and brown sugar (130g). The mix of sugars contributes to the cookies’ balanced flavor and texture. Brown sugar adds moisture and chewiness, while white sugar ensures crisp edges.
- Mix Thoroughly: Using an electric mixer or a sturdy whisk, beat the butter and sugars together for 2-3 minutes until the mixture is light and creamy. This step incorporates air, helping the cookies rise slightly in the oven.
Pro Tip: Scrape down the sides of the bowl with a spatula to ensure all ingredients are evenly mixed.
2. Adding Wet Ingredients
Wet ingredients bring moisture and flavor to the dough while binding the dry ingredients together.
- Eggs: Crack two large eggs into the bowl, one at a time. Mix well after each addition. Room-temperature eggs blend more smoothly, creating a cohesive dough.
- Vanilla Extract: Add 5ml of pure vanilla extract. This enhances the overall flavor, giving the cookies their warm, aromatic notes.
- Mix Gently: Use a medium speed on your mixer or stir by hand until the ingredients are just combined. Overmixing at this stage can make the dough tough.
3. Incorporating Dry Ingredients
Dry ingredients provide structure and balance to the dough, ensuring the cookies hold their shape and have the right texture.
- Sift Dry Ingredients: In a separate bowl, sift together all-purpose flour (250g), baking soda (5g), and salt (3g). Sifting prevents lumps and ensures even distribution.
- Gradual Addition: Add the dry ingredients to the wet mixture in small batches. Mix on low speed or fold in gently with a spatula to avoid overworking the dough.
- Combine Until Smooth: Stop mixing as soon as the flour is fully incorporated, and the dough appears uniform. Overmixing can result in dense or flat cookies.
4. Folding in Chocolate Chips
The chocolate chips are the star of this recipe, adding bursts of rich, gooey flavor to every bite.
- Measure Chips: Use 300g of semi-sweet chocolate chips. For variety, consider mixing in milk or dark chocolate chips or chunks for added texture.
- Fold Gently: Use a spatula or wooden spoon to fold the chocolate chips into the dough. Stir just enough to distribute them evenly without breaking them.
Pro Tip: Save a handful of chocolate chips to press onto the tops of the cookies before baking for a bakery-style look.
Optional Add-Ins
Feel free to customize the dough with additional ingredients, such as:
- Chopped nuts (50g) for added crunch.
- Shredded coconut for a tropical twist.
- A pinch of cinnamon or espresso powder for depth of flavor.
Tips for Success
- Chill the Dough: For better flavor and texture, chill the dough in the refrigerator for 30 minutes to an hour before baking. This allows the flour to hydrate and the butter to solidify, preventing excessive spreading during baking.
- Test Consistency: The dough should be soft but not sticky. If it’s too wet, add a tablespoon of flour; if it’s too dry, add a teaspoon of milk.
- Clean as You Go: Mixing dough can get messy. Wipe down surfaces and rinse tools as you finish each step to keep your workspace tidy.
By carefully following these steps, you’ll create a dough that’s not only easy to work with but also ensures your cookies turn out as magical and delicious as the ones served in Disney Parks.
3. Baking to Perfection
The final stage of crafting Disney’s chocolate chip cookies is baking them to perfection. This step is where all your careful preparation and mixing come to life, transforming raw dough into warm, golden cookies with gooey chocolate pockets. Achieving the ideal bake requires attention to timing, temperature, and technique. Let’s explore how to ensure your cookies come out flawless every time.
1. Preparing the Baking Trays
The foundation of even baking starts with properly prepared trays.
- Lining the Trays: Use parchment paper or silicone baking mats to line your trays. These surfaces ensure that cookies don’t stick and promote even browning on the bottom.
- Spacing the Dough: Use a cookie scoop or tablespoon to portion out the dough. Roll each scoop into a ball and place it on the tray, leaving at least 5 cm (2 inches) between cookies. This prevents them from merging as they spread during baking.
- Optional Toppings: For a bakery-style appearance, press a few extra chocolate chips into the tops of the dough balls before baking.
2. Setting the Right Oven Temperature
The key to even baking lies in controlling your oven’s temperature.
- Preheat the Oven: Preheat your oven to 180°C (350°F) well before placing the cookies inside. A properly preheated oven ensures cookies bake evenly from the start.
- Check Accuracy: Use an oven thermometer to verify that the temperature matches the setting. Many ovens run slightly hotter or cooler than indicated.
3. Baking Time and Technique
The magic happens in the oven, but timing and technique are crucial to achieving the perfect texture.
- Bake Time: Place the trays in the center of the oven and bake for 10-12 minutes.
- For soft and chewy cookies, remove them when the edges are set, and the centers look slightly underbaked.
- For crispier cookies, bake for an additional 1-2 minutes until the centers are fully set.
- Rotate Trays: Halfway through baking, rotate the trays front to back and switch their positions (if using multiple racks) to ensure even cooking.
Pro Tip: Avoid opening the oven door frequently, as this can cause temperature fluctuations and uneven baking.
4. Cooling the Cookies
Cooling is a vital step that enhances both the flavor and texture of your cookies.
- Initial Cooling: Allow cookies to cool on the baking tray for 5 minutes. This helps them firm up and makes them easier to transfer without breaking.
- Transfer to Cooling Rack: Use a spatula to move the cookies to a wire cooling rack. Let them cool completely for the best texture.
- Serving Warm: If you can’t wait to indulge, enjoy the cookies slightly warm while the chocolate is still melty.
5. Storing the Cookies
Proper storage ensures your cookies stay fresh and delicious for days.
- Airtight Containers: Store fully cooled cookies in an airtight container at room temperature for up to 5 days.
- Layering Tip: Place parchment paper between layers of cookies to prevent sticking.
- Freezing: For longer storage, freeze the cookies in an airtight container for up to 3 months. Thaw at room temperature or warm them briefly in the oven before serving.
Common Baking Issues and Solutions
- Cookies Spreading Too Much:
- Cause: Dough was too warm or butter was over-softened.
- Solution: Chill the dough for 30-60 minutes before baking.
- Cookies Too Hard or Dry:
- Cause: Overbaking or too much flour.
- Solution: Check your oven temperature and measure ingredients accurately.
- Uneven Baking:
- Cause: Uneven oven temperature or improperly rotated trays.
- Solution: Use an oven thermometer and rotate trays halfway through baking.
Tips for Success
- Experiment with Bake Times: Everyone’s oven is different. Start with the minimum bake time and adjust based on your desired texture.
- Watch the First Batch: The first batch will help you gauge how your dough spreads and bakes, allowing for adjustments in tray spacing or timing.
- Enjoy Fresh: While these cookies store well, they’re best enjoyed within the first 24 hours for the ultimate fresh-baked flavor.
By following these steps, you’ll master the art of baking Disney chocolate chip cookies to perfection, delighting family and friends with each golden, chocolate-filled bite.
The Benefits of Using Metric Measurements in Baking
1. Why Metric Measurements Matter
Metric measurements play a crucial role in ensuring the accuracy, consistency, and ease of replicating recipes, particularly when baking. For Disney’s chocolate chip cookie recipe or any baking endeavor, precise measurements can mean the difference between cookies that are perfectly chewy and flavorful or ones that fall flat. Let’s dive into why using metric measurements matters and how they can enhance your baking experience.
1. Precision in Baking
Baking is often compared to a science, and for good reason. Unlike cooking, where you can adjust ingredients on the fly, baking requires precise proportions to achieve the desired results.
- Exact Ratios: Metric measurements, such as grams and milliliters, provide exact amounts, reducing the risk of error. For example, “1 cup of flour” can vary depending on how it’s scooped, but 250 grams of flour is always 250 grams.
- Consistency: Using metric units ensures your cookies turn out the same every time you bake them, no matter where you are or how often you make the recipe.
- Chemical Reactions: Baking relies on chemical interactions between ingredients like baking soda and sugar. Precision ensures these reactions occur as intended, leading to the ideal texture and flavor.
2. Universal Application
The metric system is the standard for measurement in most countries worldwide, making it a universal language in baking.
- International Recipes: Many recipes, including Disney-inspired ones, are shared globally. Metric measurements allow bakers from different regions to follow the recipe without conversion errors.
- Uniformity Across Kitchens: If you share your cookies with friends or family in other countries, they can easily replicate your recipe using metric tools.
3. Simplified Scaling
Scaling recipes up or down is far easier when using metric measurements.
- Proportional Adjustments: If you need to double or halve the recipe, metric units make calculations straightforward. For instance, doubling 150 grams of sugar is more intuitive than doubling 3/4 cup, especially if you’re not familiar with fractions.
- Bulk Baking: For large batches, metric precision ensures that all cookies come out with consistent quality, even when working with much larger quantities of ingredients.
4. Better Kitchen Tools
Using metric measurements often requires tools that are more accurate and efficient than traditional measuring cups and spoons.
- Digital Kitchen Scales: These scales measure ingredients to the exact gram, eliminating the guesswork associated with measuring cups.
- No Need for Conversion: Baking directly in metric saves time and effort by avoiding the need to convert units, which can lead to rounding errors.
5. Avoiding Common Pitfalls
Reliance on volume-based measurements (like cups and teaspoons) can lead to inconsistencies due to factors like ingredient density, humidity, and personal scooping technique.
- Flour Variability: Flour is particularly tricky when measured by volume. Depending on how it’s packed, one cup can weigh anywhere from 120 to 150 grams. Using metric eliminates this variability.
- Liquid Precision: Liquids like milk, vanilla extract, or oil are more accurately measured in milliliters, ensuring the right balance of moisture in your dough.
6. Adopting Metric Measurements for Success
Transitioning to metric measurements might seem intimidating at first, but the benefits far outweigh the learning curve.
- Ease of Use: Once you have a digital kitchen scale, using metric measurements becomes second nature. Simply weigh ingredients directly into your mixing bowl, reducing the number of dirty dishes.
- Professional Results: Many professional bakers rely exclusively on metric units for their recipes. By adopting this system, you’re following in the footsteps of culinary experts.
A Magical Advantage
Disney’s chocolate chip cookie recipe is already a treat, but using metric measurements adds an extra layer of magic to your baking. It guarantees that every bite is as perfect as the recipe intended, allowing you to recreate the Disney experience at home with confidence.
Whether you’re a novice baker or a seasoned pro, embracing metric measurements ensures precision, consistency, and a little sprinkle of baking magic in every cookie you make.
2. Converting Recipes to Metric Units
Converting recipes from imperial measurements (cups, teaspoons, ounces) to metric units (grams, milliliters) is an essential skill for bakers who want precision, consistency, and ease in the kitchen. With a growing number of recipes shared globally, metric measurements ensure that everyone regardless of location can replicate a dish successfully. Let’s explore the steps and tips for converting recipes to metric units and why this process is worth mastering.
1. Why Convert to Metric Units?
There are several advantages to converting recipes to metric measurements:
- Consistency: Metric measurements are based on weight rather than volume, which reduces variations caused by how ingredients are packed or scooped.
- Precision: Especially in baking, accurate measurements ensure the proper balance of ingredients, resulting in the intended texture and flavor.
- Global Usability: Metric measurements are the standard in most countries, making recipes accessible to a wider audience.
2. Tools for Conversion
Converting recipes to metric is easier with the right tools:
- Digital Kitchen Scale: The most accurate way to measure dry and wet ingredients.
- Conversion Charts: Quick reference guides for common ingredients like flour, sugar, and butter.
- Online Calculators: Many websites and apps can convert recipe measurements for you.
3. Steps to Convert a Recipe
Here’s a straightforward process for converting any recipe to metric units:
- Understand the Original Measurements:
Identify whether the recipe uses cups, teaspoons, or ounces. Note whether the ingredient is measured by weight or volume. - Use Conversion Ratios:
The following standard conversions can help:- 1 cup of flour = approximately 125 grams
- 1 cup of sugar = approximately 200 grams
- 1 cup of butter = approximately 227 grams (or 250 ml for melted butter)
- 1 tablespoon = 15 milliliters
- 1 teaspoon = 5 milliliters
- Measure by Weight for Dry Ingredients:
Weighing dry ingredients like flour and sugar is more accurate than using volume measurements. - Measure by Volume for Liquids:
For liquids, convert to milliliters. For example:- 1 cup of water or milk = 240 milliliters
- 1/2 cup of oil = 120 milliliters
- Round Smartly:
For ease, round to the nearest whole number. For instance, 237 ml can be rounded to 240 ml.
4. Addressing Common Ingredients
Some ingredients require special attention during conversion:
- Flour: Different types of flour (all-purpose, bread, or cake flour) have slightly different weights per cup. Use a specific conversion for the type of flour mentioned in the recipe.
- Butter: In countries using metric, butter is often sold in 250-gram blocks, making it easy to measure.
- Eggs: A standard large egg weighs about 50 grams (without shell). If a recipe calls for 3 eggs, you can use 150 grams of beaten egg.
- Chocolate Chips: Most recipes call for these by weight. Use 300 grams instead of 1 1/2 cups.
5. Adapting Cooking Times and Temperatures
When converting recipes, remember to adapt oven temperatures from Fahrenheit to Celsius:
- 350°F = 180°C
- 375°F = 190°C
- 400°F = 200°C
6. Practice and Adjustments
Converting recipes to metric units might require some trial and error:
- Start Small: Begin with simple recipes to gain confidence.
- Adjust for Altitude or Humidity: Baking results can vary based on your environment, so you may need to tweak the recipe slightly after conversion.
- Taste Test: Always taste your results to ensure the conversion hasn’t affected flavor or texture.
7. Benefits of Metric Conversion for Disney Treats
When baking iconic recipes like Disney’s chocolate chip cookies, metric conversion ensures you capture the magic as intended:
- Exact Texture: Precise measurements lead to cookies that are perfectly chewy or crisp, depending on your preference.
- Effortless Sharing: Sharing your recipe with friends and family around the world is easier when it’s in metric units.
Tips for Smooth Conversions
- Invest in a Quality Scale: A reliable digital kitchen scale makes conversions seamless.
- Double-Check Ratios: Some ingredients, like baking soda or powder, require precise amounts for chemical reactions.
- Create a Conversion Template: Keep a handy table of common ingredient conversions for quick reference.
Converting recipes to metric measurements may seem daunting at first, but with a little practice, it becomes second nature. For bakers seeking precision and consistency whether recreating Disney magic or exploring new recipes, metric units are the key to success.
3. Baking Tips for Beginners
Baking can seem intimidating for first-timers, but with the right tips and a little practice, anyone can create delicious treats like Disney’s chocolate chip cookies. From understanding your ingredients to mastering simple techniques, these beginner-friendly tips will help you build confidence and enjoy the magic of baking.
1. Start with Simple Recipes
It’s tempting to dive into complex bakes, but starting with simpler recipes ensures success and builds your confidence.
- Why It’s Important: Recipes like chocolate chip cookies have straightforward steps and are forgiving, making them perfect for learning basic baking techniques.
- Learn as You Go: Simple recipes teach essential skills like measuring, mixing, and baking times, which you can build upon for more advanced recipes later.
2. Read the Recipe Thoroughly
One of the most common beginner mistakes is not reading the recipe all the way through before starting.
- Understand the Steps: Familiarize yourself with the process to avoid surprises or missed steps.
- Check Ingredients and Tools: Ensure you have everything you need on hand, including ingredients and equipment.
3. Measure Ingredients Accurately
Baking is a science, and precise measurements are essential for achieving the desired results.
- Use a Kitchen Scale: For dry ingredients like flour and sugar, weighing them in grams ensures accuracy.
- Level Off Ingredients: If using measuring cups, use a knife or spatula to level off dry ingredients for consistent results.
- Liquid Measuring Cups: Use clear cups with spouts for liquids, and measure at eye level to ensure accuracy.
4. Bring Ingredients to Room Temperature
Many recipes call for ingredients like butter, eggs, and milk to be at room temperature.
- Why It Matters: Room-temperature ingredients mix more easily and evenly, resulting in a smoother batter or dough.
- Quick Tips:
- To soften butter quickly, cut it into small cubes and let it sit for 15-20 minutes.
- Place eggs in a bowl of warm (not hot) water for 5-10 minutes to bring them to room temperature.
5. Follow Mixing Instructions Carefully
How you mix your ingredients can significantly impact the texture of your baked goods.
- Cream Butter and Sugar Properly: When a recipe calls for creaming, beat the butter and sugar until light and fluffy. This incorporates air, creating a tender texture.
- Don’t Overmix: Overmixing, especially after adding flour, can develop gluten, resulting in dense or tough cookies. Mix until just combined.
- Fold Gently: If adding extras like chocolate chips, fold them into the dough with a spatula to avoid overworking the mixture.
6. Prep Your Baking Tools and Space
A well-organized kitchen can make the baking process smoother and more enjoyable.
- Line Trays Properly: Use parchment paper or silicone baking mats to prevent sticking and promote even baking.
- Preheat the Oven: Always preheat your oven to the specified temperature before baking. An accurate temperature ensures consistent results.
- Clean as You Go: Keep your workspace tidy by cleaning bowls and utensils as you finish using them.
7. Keep an Eye on Baking Times
Even with precise recipes, baking times can vary slightly depending on your oven.
- Check Early: Begin checking for doneness a few minutes before the suggested baking time.
- Know the Signs: For cookies, the edges should be set, and the centers may appear slightly soft. This ensures they remain chewy as they cool.
- Rotate Trays: If using multiple trays, rotate them halfway through baking to promote even cooking.
8. Cooling Matters
Allowing your baked goods to cool properly is just as important as baking them.
- Cool on Trays First: Let cookies sit on the baking tray for 5 minutes to firm up before transferring them.
- Use a Cooling Rack: Transfer cookies to a wire rack to cool completely, which prevents soggy bottoms.
9. Learn from Mistakes
Every baker, beginner or experienced, has occasional mishaps. Use them as learning opportunities.
- Adjust Next Time: If your cookies spread too much or are too dry, tweak your technique or measurements for the next batch.
- Ask for Advice: Don’t hesitate to seek tips from experienced bakers or online communities.
10. Enjoy the Process
Baking is as much about the experience as it is about the final product.
- Have Fun: Enjoy experimenting and learning with each recipe.
- Share Your Creations: Share your cookies with family and friends, it’s a great way to spread joy and get feedback.
By following these beginner-friendly tips, you’ll set yourself up for baking success. Whether it’s your first batch of Disney-inspired cookies or another simple treat, these fundamentals will help you create delicious results while enjoying the magical process of baking.
Frequently Asked Questions About Disney Chocolate Chip Cookies
Can I Freeze the Cookie Dough?
Freezing cookie dough is a game-changer for anyone who loves fresh, warm cookies but doesn’t always have time to bake a full batch. It’s a practical solution for meal prepping, minimizing waste, and enjoying Disney’s chocolate chip cookies on demand. Let’s dive into why freezing cookie dough is a great idea, how to do it correctly, and tips for baking frozen dough.
1. Why Freeze Cookie Dough?
There are several reasons to freeze cookie dough instead of baking all the cookies at once:
- Convenience: Having cookie dough ready to bake saves time and effort when cravings strike or unexpected guests arrive.
- Freshness: Baking cookies fresh from frozen ensures they taste as good as the first batch, with that perfect texture and aroma.
- Portion Control: Freezing dough allows you to bake only the number of cookies you need, reducing waste and overindulgence.
- Make-Ahead Prep: Perfect for busy schedules or planning for special occasions, holidays, or parties.
2. How to Freeze Cookie Dough
Freezing cookie dough is simple and ensures that your dough retains its quality for weeks or even months. Here’s a step-by-step guide:
- Prepare the Dough: Follow your Disney chocolate chip cookie recipe and mix the dough as usual.
- Shape the Dough:
- For easy portioning, roll the dough into balls, about the size specified in the recipe.
- Place the balls on a baking sheet lined with parchment paper, ensuring they don’t touch.
- Pre-Freeze the Dough: Freeze the tray of dough balls for 1-2 hours or until solid. This step prevents the dough from sticking together during storage.
- Store in an Airtight Container: Transfer the frozen dough balls to a zip-top freezer bag or airtight container. Label with the date and baking instructions.
- Freeze: Store in the freezer for up to 3 months.
3. Baking Cookies from Frozen Dough
The beauty of freezing cookie dough is that you can bake it straight from the freezer with minimal effort:
- Preheat the Oven: Set your oven to the temperature specified in the recipe.
- Place on Baking Tray: Arrange the frozen dough balls on a parchment-lined baking tray, leaving enough space for spreading.
- Add a Few Extra Minutes: Frozen dough may need 1-2 minutes longer to bake than fresh dough. Keep an eye on the cookies, checking for doneness as usual (edges set, centers slightly soft).
- Optional: Sprinkle a pinch of flaky sea salt on the dough balls before baking for added flavor.
4. Tips for Freezing Cookie Dough Successfully
To ensure the best results, keep these tips in mind:
- Use High-Quality Ingredients: Since frozen dough may be stored for weeks, using fresh, high-quality ingredients ensures the best taste and texture.
- Double-Wrap for Freshness: For extended storage, wrap the dough balls in plastic wrap before placing them in a freezer bag. This prevents freezer burn.
- Batch Prep: Freeze multiple batches of cookie dough at once to always have a variety of cookies ready to bake.
- Label Clearly: Always label your freezer bags or containers with the type of dough, date of freezing, and baking instructions.
5. Alternative Freezing Methods
If you prefer not to pre-portion the dough, you can freeze it in bulk:
- Log or Block: Shape the dough into a log or flatten it into a block, wrap tightly in plastic wrap, and place in a freezer bag. Thaw slightly before scooping and baking.
- Layered Storage: If freezing scooped dough balls directly in a container, layer them with parchment paper to prevent sticking.
6. Benefits of Freezing Disney’s Cookie Dough
Freezing your Disney chocolate chip cookie dough means you can enjoy the magic of freshly baked cookies anytime. It’s especially useful for:
- Holiday Prep: Make dough ahead of time for holidays and bake fresh cookies as needed.
- Gifting: Frozen dough makes a thoughtful gift for friends or family who love baking. Include a printed recipe and baking instructions for a personal touch.
- Small Batch Baking: Bake just a few cookies for an after-dinner treat or late-night snack without committing to a full batch.
Freezing cookie dough is an easy, efficient way to ensure you’re never far from the joy of freshly baked Disney chocolate chip cookies. With a little preparation, you can keep the magic of Disney in your freezer, ready to share with family and friends whenever the mood strikes!
What Makes This Recipe Unique?
The Disney chocolate chip cookie recipe stands out not just because it’s inspired by the magic of Disney, but also because of its distinctive features that elevate it beyond a standard cookie recipe. From the careful selection of ingredients to the unique preparation techniques, this recipe embodies creativity, nostalgia, and culinary excellence. Let’s delve into what makes this recipe truly one-of-a-kind.
1. Inspired by Disney’s Culinary Magic
Disney is renowned for its attention to detail and commitment to creating unforgettable experiences, and its recipes are no exception.
- Nostalgia and Emotion: Each bite transports you to the magical world of Disney, evoking fond memories of visits to the parks or favorite Disney movies.
- Storytelling Through Food: Like everything Disney creates, this recipe tells a story of joy, imagination, and bringing people together.
- A Taste of the Parks: For those who have visited Disney theme parks, these cookies bring the same iconic flavors into your home.
2. Perfectly Balanced Flavors
The Disney chocolate chip cookie recipe excels in balancing flavors to create a cookie that’s rich, satisfying, and indulgent.
- Sweetness and Depth: The use of both brown and granulated sugar adds a complex sweetness and a hint of caramel flavor.
- Chocolate Lovers’ Dream: With generous amounts of high-quality chocolate chips, each bite delivers a satisfying burst of creamy, melty chocolate.
- Hint of Salt: A pinch of salt enhances the sweetness and rounds out the flavors, giving the cookies a gourmet touch.
3. Exceptional Texture
The texture of these cookies is what truly sets them apart, offering a delightful combination of contrasts.
- Chewy Centers: Achieved through the perfect balance of wet and dry ingredients, the centers are soft and tender without being underbaked.
- Crispy Edges: The edges are delicately crisp, providing a satisfying contrast to the chewy interior.
- Melt-in-Your-Mouth Quality: Thanks to the precise measurements and preparation techniques, the cookies have a light, buttery feel.
4. The Use of Metric Measurements
Unlike many recipes that stick to imperial units, this version is fully converted to metric measurements, making it universally accessible and precise.
- Global Appeal: Metric measurements ensure bakers around the world can replicate the recipe with ease.
- Precision Baking: Measuring ingredients by weight rather than volume reduces variability, ensuring consistent results every time.
5. Simple Yet Sophisticated Preparation Techniques
While the recipe is beginner-friendly, it incorporates techniques that elevate the cookies to a professional level:
- Chilling the Dough: A critical step that enhances flavor and prevents excessive spreading during baking.
- Creaming the Butter and Sugar: Incorporating air during this step ensures a light and fluffy texture.
- Perfectly Portioned Dough: Using a cookie scoop ensures even baking and uniform cookies.
6. High-Quality Ingredients
Disney’s recipe emphasizes the importance of using premium ingredients, which make a significant difference in the final product.
- Real Butter: Adds a rich, creamy flavor and enhances the overall texture.
- Pure Vanilla Extract: A key ingredient that adds depth and a warm, aromatic note to the cookies.
- Premium Chocolate: High-quality chocolate chips or chunks make every bite indulgent and luxurious.
7. Versatile and Customizable
Another unique aspect of this recipe is its versatility, it’s easy to customize while still retaining its magic.
- Add-Ins: Beyond chocolate chips, you can mix in nuts, dried fruit, or even a sprinkle of sea salt for variety.
- Texture Tweaks: Adjust the baking time slightly to make the cookies softer or crunchier to suit your preference.
- Shaped for Any Occasion: Use themed cookie cutters or molds to match your cookies with holidays or Disney-themed events.
8. Designed for Sharing and Celebration
This recipe is not just about making cookies; it’s about creating memories and sharing joy.
- Family-Friendly Fun: The recipe is simple enough for kids to help, making it a fun family activity.
- Perfect for Gatherings: Whether it’s a movie night, birthday party, or holiday celebration, these cookies are always a crowd-pleaser.
- A Touch of Disney Magic at Home: For Disney fans, this recipe is a delightful way to bring a touch of the parks into everyday life.
Disney’s chocolate chip cookie recipe isn’t just a recipe, it’s an experience. It combines precision, quality, and a sprinkle of magic to create cookies that aren’t just delicious but also meaningful. Whether you’re baking for yourself, your family, or a special occasion, this recipe stands out as a unique and treasured treat.
How Can I Customize the Cookies?
One of the most exciting aspects of Disney’s chocolate chip cookie recipe is its versatility. While the original recipe is already magical, customizing it allows you to infuse your personal touch, experiment with flavors, and create cookies tailored to your tastes or special occasions. Whether you’re looking to add extra indulgence, cater to dietary preferences, or get creative for a themed party, there are countless ways to make these cookies your own.
1. Experiment with Different Add-Ins
The classic chocolate chip cookie is the perfect base for incorporating a variety of flavors and textures.
- Nuts and Seeds: Add chopped walnuts, pecans, or almonds for a crunchy texture and nutty flavor. Sunflower or pumpkin seeds also work well for a unique twist.
- Dried Fruits: Mix in dried cranberries, raisins, or chopped apricots for a sweet and tangy contrast to the chocolate.
- Candy Pieces: Add chopped candy bars, M&M’s, or caramel bits to make the cookies extra indulgent and colorful.
- Spices: Sprinkle in a pinch of cinnamon, nutmeg, or even cardamom to add warmth and depth to the flavor.
2. Play with Different Types of Chocolate
While semi-sweet chocolate chips are the traditional choice, there’s no rule against experimenting with other varieties.
- Dark Chocolate: Use dark chocolate chips or chunks for a richer, more intense flavor.
- White Chocolate: Add a creamy sweetness by incorporating white chocolate chips.
- Milk Chocolate: For a milder, sweeter taste, milk chocolate is a great option.
- Chocolate Mix: Combine two or more types of chocolate for a layered flavor profile.
3. Adjust the Cookie Size and Shape
Customizing the size and shape of the cookies can create entirely new experiences.
- Mini Cookies: Scoop smaller portions of dough to make bite-sized treats, perfect for snacking or sharing.
- Giant Cookies: Create bakery-style jumbo cookies by using a larger scoop and slightly longer baking time.
- Cookie Bars: Press the dough into a rectangular pan and bake as bars for a unique presentation and chewy texture.
- Shaped Cookies: Use cookie cutters to make fun shapes, especially for themed parties or holidays.
4. Incorporate Dietary Substitutions
For those with dietary restrictions, the recipe can be adapted to accommodate various needs.
- Gluten-Free: Replace regular flour with a gluten-free blend for a cookie that’s safe for those with gluten sensitivities.
- Dairy-Free: Use plant-based butter or coconut oil and dairy-free chocolate chips for a lactose-free option.
- Vegan: Substitute eggs with flaxseed meal or unsweetened applesauce and choose plant-based ingredients.
- Low-Sugar: Use a sugar substitute like monk fruit sweetener or stevia to reduce the sugar content.
5. Add a Unique Topping or Drizzle
A finishing touch can take your cookies from ordinary to extraordinary.
- Sprinkles: Add colorful sprinkles to the dough or on top before baking for a festive vibe.
- Sea Salt: Sprinkle a pinch of flaky sea salt on top of the cookies before baking to enhance the sweetness.
- Chocolate Drizzle: Melt some chocolate and drizzle it over the cooled cookies for an elegant look and extra flavor.
- Powdered Sugar: Dust the cookies with powdered sugar after baking for a classic, sweet finish.
6. Infuse Unique Flavors into the Dough
Adding a splash of unexpected flavor can transform the cookie’s taste profile.
- Extracts: Replace or supplement vanilla extract with almond, coconut, or mint extract for a distinctive twist.
- Citrus Zest: Incorporate grated orange or lemon zest for a fresh, tangy note.
- Coffee or Espresso: Add a teaspoon of instant coffee granules to the dough to enhance the chocolate flavor with a mocha touch.
- Matcha: Mix in a small amount of matcha powder for a subtle earthy flavor and a vibrant green hue.
7. Themed and Seasonal Customizations
Tailor your cookies to match a specific theme, holiday, or celebration.
- Holiday Themes: Use red and green candies for Christmas, pastel sprinkles for Easter, or heart-shaped cookies for Valentine’s Day.
- Disney-Inspired: Incorporate Mickey-shaped cookie cutters or use Disney-themed sprinkles to emphasize the Disney magic.
- Birthday Parties: Decorate cookies with icing and edible glitter for a festive birthday treat.
- Seasonal Flavors: Incorporate pumpkin spice for fall or crushed candy canes for a winter holiday vibe.
Customizing the Disney chocolate chip cookie recipe not only makes it more personal but also adds an element of fun and creativity to your baking. With endless possibilities, you can adapt this beloved recipe to suit any mood, occasion, or craving, ensuring that each batch of cookies is as unique and magical as the last.
Disney’s chocolate chip cookie recipe, converted into metric measurements, offers a delightful way to bring a touch of magic into your kitchen. Whether you’re a seasoned baker or just starting, this recipe ensures precision, simplicity, and delicious results. By using metric units, it caters to a global audience and guarantees consistency, helping you recreate the iconic flavors of Disney’s beloved cookies with ease.
From its perfectly balanced flavors and ideal texture to its versatility for customization, this recipe stands out as a true crowd-pleaser. It’s more than just a recipe, it’s an invitation to create memories, share joy, and indulge in the nostalgia of Disney magic.
So, gather your ingredients, preheat your oven, and embark on this baking adventure. Whether you’re making them for family, friends, or a special treat for yourself, these cookies are sure to bring smiles and create moments that feel as magical as a day at Disney.