
Fish and chips is a classic comfort food beloved by many, but traditional recipes often come with ingredients that may not suit everyone’s dietary needs. If you’re following a lectin-free lifestyle or simply looking for a healthier alternative, this lectin-free fish and chips recipe is the perfect solution. Packed with flavor, free of inflammatory ingredients, and made using wholesome, gut-friendly alternatives, this dish offers a fresh twist on an old favorite.
By swapping out traditional batter and fries for lectin-free options like almond flour and sweet potato, you can enjoy the crispy texture and savory taste you love (without compromising your health). Whether you’re new to the lectin-free diet or a seasoned pro, this recipe will become a go-to in your kitchen. Let’s dive into how you can recreate this healthy, delicious classic right at home!
Why Choose a Lectin-Free Fish and Chips Recipe
1. What Are Lectins?
Lectins are a type of protein found in many plants that act as a natural defense mechanism, protecting them from being eaten by pests. While they play an important role in nature, these proteins can be problematic for human digestion when consumed in large amounts or in their raw form.
How Do Lectins Work in the Body?
When lectins are consumed, they can bind to carbohydrates in the body, particularly in the gut lining. This binding may interfere with nutrient absorption and irritate the intestinal lining, potentially leading to issues like inflammation, leaky gut syndrome, or other digestive discomforts. Some people are more sensitive to lectins than others, which is why they’re often avoided in specialized diets like the lectin-free diet.
Common Foods Containing Lectins
Lectins are present in a variety of foods, but some of the most common sources include:
- Legumes: Beans, lentils, and peanuts.
- Grains: Wheat, corn, and rice.
- Nightshade Vegetables: Tomatoes, peppers, potatoes, and eggplants.
- Dairy Products: Certain dairy items may also contain trace amounts of lectins.
Cooking, soaking, or fermenting these foods can reduce their lectin content, but for people following a lectin-free diet, completely avoiding high-lectin foods is often recommended.
Why Avoid Lectins?
Many individuals avoid lectins to improve their gut health, reduce inflammation, and alleviate symptoms associated with autoimmune disorders or food sensitivities. Proponents of the lectin-free diet, such as Dr. Steven Gundry, argue that eliminating lectins can lead to better digestion, increased energy levels, and overall improved health.
2. Benefits of a Lectin-Free Diet
The lectin-free diet has gained popularity as more people seek ways to optimize their health by reducing inflammatory and gut-irritating foods. While not everyone is sensitive to lectins, individuals who are can experience significant benefits by eliminating or minimizing them in their diet. Here’s a closer look at how a lectin-free lifestyle can positively impact your health.
1. Improved Digestive Health
Lectins can bind to the intestinal lining, potentially causing irritation and disrupting nutrient absorption. For those with sensitive digestive systems, this can lead to bloating, gas, and discomfort. By removing lectin-rich foods, the gut lining has a chance to heal, leading to better digestion and nutrient assimilation.
2. Reduced Inflammation
Chronic inflammation is a common underlying factor in many health issues, including autoimmune conditions and joint pain. Because lectins can trigger inflammatory responses in some people, cutting them out of your diet may help reduce inflammation, resulting in less pain, swelling, and overall discomfort.
3. Support for Autoimmune Conditions
Autoimmune diseases occur when the immune system mistakenly attacks the body’s tissues. Lectins are thought to exacerbate these issues by contributing to “leaky gut syndrome,” a condition where the gut lining becomes permeable, allowing undigested particles and toxins to enter the bloodstream. A lectin-free diet can help repair the gut lining and reduce immune system overactivity, potentially alleviating symptoms of autoimmune disorders.
4. Enhanced Energy Levels
Foods high in lectins can sometimes cause blood sugar spikes and crashes, leading to fatigue and energy dips. By focusing on lectin-free alternatives, you’re likely to consume more nutrient-dense, balanced meals that provide sustained energy throughout the day.
5. Weight Management
Lectin-rich foods, such as processed grains and sugars, are often calorie-dense and low in nutritional value. A lectin-free diet emphasizes whole, unprocessed foods, which can help regulate appetite, improve metabolism, and support healthy weight loss or maintenance.
6. Clearer Skin and Improved Allergy Symptoms
Some people report that eliminating lectins from their diet has helped clear up skin conditions such as eczema or acne. Additionally, because lectins can contribute to systemic inflammation, reducing them may also improve seasonal allergies and other inflammatory conditions.
7. Better Blood Sugar Control
For those managing diabetes or prediabetes, a lectin-free diet may offer benefits by stabilizing blood sugar levels. Lectin-free foods tend to have a lower glycemic index, helping to prevent blood sugar spikes and crashes.
Key Foods to Enjoy on a Lectin-Free Diet
To maximize the benefits of this lifestyle, focus on foods naturally low in lectins, such as:
- Leafy greens and non-starchy vegetables
- Grass-fed meats and wild-caught fish
- Healthy fats like avocado, olive oil, and ghee
- Alternatives to grains, such as almond or cassava flour
3. Why This Recipe Stands Out
When it comes to comfort food, fish and chips is a dish that’s hard to beat. However, traditional recipes often rely on ingredients like wheat flour and vegetable oils, which can be heavy on lectins and unhealthy fats. This lectin-free fish and chips recipe takes a fresh approach, offering a healthier alternative without sacrificing flavor or texture. Here’s why this recipe is a standout choice for anyone looking to enjoy a guilt-free version of this classic meal.
1. Gut-Friendly Ingredients
This recipe replaces high-lectin ingredients with alternatives that are gentle on the digestive system. Instead of wheat flour, it uses almond flour or cassava flour, both of which are naturally gluten-free and lectin-free. These flours not only provide a crispy coating but are also nutrient-rich, offering fiber, healthy fats, and essential minerals.
2. A Healthier Take on Frying
Traditional fish and chips are often deep-fried in vegetable oils, which can be inflammatory and unhealthy when heated to high temperatures. This recipe uses healthier cooking methods, such as frying in avocado oil, known for its high smoke point and heart-healthy fats, or baking in an oven or air fryer for an even lighter option. These changes make the dish suitable for a variety of dietary needs, including paleo and keto lifestyles.
3. Perfectly Crispy Texture
Achieving that signature crunch in fish and chips can be challenging without conventional flours and frying techniques. However, this recipe offers a foolproof batter made with lectin-free ingredients that delivers a golden, crispy exterior every time. Techniques like double-coating the fish and chilling the batter help enhance the texture, making it just as satisfying as the original.
4. Innovative Side Dish Alternatives
The chips in this recipe aren’t your standard white potatoes, which are high in lectins. Instead, it suggests using alternatives like sweet potatoes, cassava, or even parsnips. These root vegetables provide a similar starchy satisfaction while being low in lectins and packed with vitamins and minerals. Baked or air-fried, they complement the fish perfectly while adding a unique twist.
5. Diet-Friendly and Versatile
This recipe caters to a wide range of dietary preferences. It’s naturally gluten-free, making it ideal for those with gluten sensitivities, and the use of nutrient-dense, unprocessed ingredients aligns well with lectin-free, paleo, and anti-inflammatory diets. Additionally, it’s customizable! you can adjust the seasoning, side dishes, or cooking method to suit your taste and health goals.
6. Simple and Accessible
Despite its health-focused ingredients, this recipe remains simple to prepare. The batter requires only a few pantry staples, and the cooking process is straightforward, whether you choose to fry, bake, or air-fry the fish. Even if you’re new to lectin-free cooking, this recipe makes it easy to create a delicious meal that’s both nourishing and satisfying.
By focusing on gut-friendly, nutrient-rich ingredients and healthy cooking techniques, this lectin-free fish and chips recipe stands out as a modern take on a timeless classic. It’s proof that comfort food can be both delicious and aligned with your health goals. Ready to try it out? Let’s get cooking!
Ingredients for the Best Lectin-Free Fish and Chips
1. Fish Fillet Options
The choice of fish fillet plays a key role in the success of your lectin-free fish and chips recipe. The type of fish you use will influence the flavor, texture, and overall experience of the dish. Here’s a guide to selecting the best fish fillets for this recipe, including tips on preparation and alternatives for every taste.
1. Popular Fish Choices
- Cod: Cod is a classic choice for fish and chips, and for good reason. Its mild flavor, flaky texture, and ability to hold up well during frying make it an excellent option. Cod is also widely available, making it a convenient choice for most home cooks.
- Haddock: Slightly stronger in flavor than cod, haddock is another traditional option. It has a delicate, flaky texture and works wonderfully with the crispy batter in this recipe.
- Tilapia: For those looking for a more affordable and accessible fish, tilapia is a great choice. Its mild taste allows the seasoning in the batter to shine, making it a versatile option.
2. Premium or Alternative Fish Options
- Halibut: If you’re looking for a premium option, halibut’s firm, meaty texture and clean flavor make it ideal for fish and chips. It holds up well during frying and pairs beautifully with the light, crispy batter.
- Pollock: Pollock is a budget-friendly alternative that still delivers on flavor and texture. It’s a sustainable choice that works well in this recipe, particularly for larger families or gatherings.
- Wild-Caught Salmon: For a unique twist, consider using wild-caught salmon. Its rich flavor and higher fat content provide a delicious variation on the traditional fish and chips.
3. Choosing the Best Quality Fish
- Wild-Caught vs. Farmed: Whenever possible, opt for wild-caught fish. It tends to be leaner, richer in omega-3 fatty acids, and free of additives often found in farmed fish.
- Fresh or Frozen: Both fresh and frozen fillets work well for this recipe. If using frozen fish, ensure it is fully thawed and patted dry before coating it in batter to achieve the best results.
- Skin-On or Skinless: Skinless fillets are generally preferred for fish and chips, as they allow for an even coating of batter. If you choose fillets with the skin on, make sure it is scaled and cooked until crispy.
4. Preparing the Fish
- Cutting to Size: For easy handling and even cooking, cut the fillets into uniform pieces about 4–6 inches long. This ensures that all pieces cook evenly and are easy to eat.
- Patting Dry: Before battering, pat the fish dry with paper towels. This helps the batter adhere properly and ensures a crispy coating.
- Seasoning: Lightly season the fillets with salt, pepper, or a touch of lemon juice before dipping them into the batter. This enhances the flavor of the fish without overpowering it.
5. Sustainability Matters
When selecting your fish, consider sustainability. Look for certifications like MSC (Marine Stewardship Council) or ASC (Aquaculture Stewardship Council) to ensure you’re making an environmentally responsible choice. Overfishing and unsustainable practices can impact ocean health, so choosing certified fish supports long-term sustainability.
By carefully selecting your fish fillet, you can elevate your lectin-free fish and chips to a new level. Whether you prefer the mildness of cod, the richness of salmon, or the meaty texture of halibut, there’s a perfect option for every taste and budget. Let your choice of fish be the star of this delicious, health-conscious dish!
2. Lectin-Free Batter Alternatives
The batter is what gives fish and chips its signature crispy texture, but traditional batters often rely on wheat flour and other lectin-rich ingredients. For this lectin-free fish and chips recipe, we’re swapping out conventional options for gut-friendly, nutrient-dense alternatives that deliver all the crunch and flavor you love. Here are some of the best lectin-free batter alternatives to try, along with tips for achieving the perfect coating.
1. Almond Flour Batter
Almond flour is a versatile and popular choice for lectin-free cooking. It’s naturally gluten-free and packed with nutrients like vitamin E, healthy fats, and protein.
- Texture and Flavor: Almond flour creates a light, nutty-flavored coating that crisps up beautifully when fried or baked.
- Preparation Tips: Mix almond flour with a bit of arrowroot or tapioca starch to improve the texture and help the batter adhere to the fish. Adding seasonings like garlic powder, paprika, or dried herbs enhances the flavor.
- Best Cooking Method: Almond flour works well for both frying and baking. If frying, use a high-smoke-point oil like avocado oil to prevent burning.
2. Cassava Flour Batter
Cassava flour, made from the whole cassava root, is another excellent lectin-free option. It’s closer in texture to wheat flour, making it a favorite for recipes that require a traditional feel.
- Texture and Flavor: This flour produces a smooth, golden crust with a neutral taste that lets the fish’s flavor shine through.
- Preparation Tips: Combine cassava flour with sparkling water or soda water for a light, airy batter. This creates bubbles in the coating, mimicking the texture of beer batter without the gluten or lectins.
- Best Cooking Method: Cassava flour batter is ideal for frying but can also be baked or air-fried for a healthier alternative.
3. Coconut Flour Batter
Coconut flour is a low-carb, high-fiber option that works well for those on keto or paleo diets. It absorbs liquid quickly, so it’s best used in combination with other flours.
- Texture and Flavor: Coconut flour adds a subtle sweetness to the batter, making it unique and delicious when paired with savory fish.
- Preparation Tips: Mix coconut flour with almond or cassava flour to balance its absorbent nature. Use eggs or a non-dairy milk to thin the batter and ensure even coating.
- Best Cooking Method: Coconut flour batter is best suited for frying or air-frying, as it crisps up nicely at high temperatures.
4. Tapioca or Arrowroot Starch Coating
Tapioca starch and arrowroot are starches derived from roots, making them naturally lectin-free. While they’re often used as thickening agents, they can also create a light, crispy coating for fish.
- Texture and Flavor: These starches result in an ultra-crispy, almost translucent crust. They’re perfect if you prefer a thinner batter that highlights the fish’s texture.
- Preparation Tips: Use the starch alone or mix it with almond or cassava flour for a more robust coating. For extra crispiness, double-dip the fish by coating it in starch, dipping it in an egg wash, and then coating it again.
- Best Cooking Method: Tapioca or arrowroot starch is ideal for frying, as it crisps up quickly in hot oil.
5. Chickpea Flour Batter (Optional for Flexibility)
Although chickpeas contain lectins, they’re significantly reduced during cooking and processing. If your diet allows for some flexibility, chickpea flour can be a nutritious alternative.
- Texture and Flavor: Chickpea flour offers a rich, earthy flavor and creates a denser coating, ideal for a heartier dish.
- Preparation Tips: Mix chickpea flour with water or a non-dairy milk to create a smooth batter. Adding spices like turmeric or cumin can enhance the flavor profile.
- Best Cooking Method: This batter works best for frying but can also be baked for a lighter version.
6. Egg and Crushed Nut Coating
For a completely grain- and starch-free option, consider using an egg wash and crushed nuts like pecans or macadamias.
- Texture and Flavor: This method produces a crunchy, nutty crust that’s unique and nutrient-dense.
- Preparation Tips: Dip the fish in a beaten egg, then coat it in finely crushed nuts mixed with seasonings. This works well for smaller fillets or fish bites.
- Best Cooking Method: Baking or air-frying is the preferred method to prevent the nuts from burning.
Tips for the Perfect Batter
- Chill the Batter: Letting your batter rest in the fridge for 15–20 minutes before use can help improve adhesion and crispiness.
- Double-Coating: For extra crunch, dip the fish in batter, coat it in flour or starch, and repeat before frying.
- Choose the Right Oil: Use high-smoke-point oils like avocado, coconut, or ghee for frying to avoid burning and maintain a healthy profile.
By exploring these lectin-free batter alternatives, you can create a fish and chips dish that’s not only healthier but also tailored to your taste and dietary needs. Whether you prefer the nutty flavor of almond flour or the traditional texture of cassava flour, there’s an option for everyone.
3. Healthy Oils for Frying
The choice of oil can make or break your lectin-free fish and chips recipe. Traditional frying oils, such as vegetable or canola oil, are often highly processed and prone to forming harmful compounds when heated to high temperatures. For a healthier and tastier outcome, it’s essential to select oils that are both heat-stable and nutrient-rich. Here’s a detailed guide to the best oils for frying your fish and chips, ensuring a crispy texture without compromising your health.
1. Avocado Oil
Avocado oil is a top choice for frying due to its impressive heat stability and health benefits.
- Smoke Point: With a high smoke point of around 520°F (271°C), avocado oil is ideal for deep-frying or pan-frying. It won’t break down into harmful compounds, even at high temperatures.
- Nutritional Benefits: Rich in heart-healthy monounsaturated fats, avocado oil supports cardiovascular health and reduces inflammation. It also contains antioxidants like vitamin E.
- Flavor Profile: Avocado oil has a mild, buttery flavor that doesn’t overpower the dish, allowing the fish’s natural taste to shine.
2. Coconut Oil
Coconut oil is another excellent option for frying, especially for those following a paleo or keto diet.
- Smoke Point: Refined coconut oil has a smoke point of about 400°F (204°C), making it suitable for frying. Unrefined (virgin) coconut oil has a lower smoke point but can still be used for shallow frying.
- Nutritional Benefits: Coconut oil is high in medium-chain triglycerides (MCTs), which are easily digested and converted into energy. It also has antimicrobial properties that support gut health.
- Flavor Profile: Virgin coconut oil has a mild coconut flavor that can add a subtle sweetness to the dish. Refined coconut oil is neutral in taste.
3. Ghee (Clarified Butter)
Ghee, a type of clarified butter, is a traditional cooking fat known for its rich, nutty flavor and high smoke point.
- Smoke Point: Ghee has a smoke point of about 485°F (252°C), making it suitable for frying without breaking down.
- Nutritional Benefits: Ghee is free of lactose and casein, making it a great option for those with dairy sensitivities. It’s also rich in fat-soluble vitamins like A, D, and K2, which support bone and immune health.
- Flavor Profile: Ghee imparts a deep, buttery flavor to the fish, enhancing the overall taste of the dish.
4. Olive Oil (Light or Refined)
While extra virgin olive oil is best for dressings and low-heat cooking, light or refined olive oil can be used for frying.
- Smoke Point: Light olive oil has a smoke point of about 465°F (240°C), making it suitable for frying. Extra virgin olive oil’s smoke point is lower, around 375°F (191°C).
- Nutritional Benefits: Olive oil is high in monounsaturated fats and contains antioxidants that support heart health and reduce inflammation.
- Flavor Profile: Light olive oil has a neutral taste, while extra virgin olive oil adds a fruity, slightly peppery flavor.
5. Tallow or Lard
For a traditional frying fat, consider using animal-based options like tallow (rendered beef fat) or lard (rendered pork fat).
- Smoke Point: Both tallow and lard have high smoke points of around 400°F (204°C) or higher, depending on the source.
- Nutritional Benefits: These fats are natural sources of saturated fats, which are heat-stable and less likely to oxidize. They also contain fat-soluble vitamins and provide a rich energy source.
- Flavor Profile: Tallow and lard offer a savory, meaty flavor that complements the fish and chips, particularly for a more rustic take on the dish.
6. Macadamia Nut Oil
Macadamia nut oil is an underrated choice for frying, boasting both health benefits and excellent heat stability.
- Smoke Point: With a smoke point of about 410°F (210°C), macadamia nut oil is a reliable option for frying.
- Nutritional Benefits: This oil is rich in monounsaturated fats and has a balanced omega-3 to omega-6 ratio, which supports heart and brain health.
- Flavor Profile: It has a subtle, nutty flavor that pairs well with fish, enhancing its natural taste.
Tips for Frying with Healthy Oils
- Monitor the Temperature: Use a thermometer to keep the oil at an optimal temperature (usually 350–375°F or 175–190°C) to ensure even cooking and avoid burning.
- Avoid Reusing Oil: Reusing oil can lead to the formation of harmful compounds. Discard oil after frying or use it sparingly for another dish.
- Use Enough Oil: Ensure there’s enough oil to submerge the fish fully or coat it evenly. This helps achieve a uniform crispy texture.
- Drain Excess Oil: After frying, place the fish and chips on a paper towel-lined plate to remove excess oil and keep them light.
By choosing the right oil, you not only enhance the taste and texture of your lectin-free fish and chips but also ensure that your dish aligns with your health goals. Whether you prefer the buttery richness of ghee or the neutral crispiness of avocado oil, the right choice makes all the difference!
4. Optional Side Dishes
No fish and chips meal is complete without the perfect accompaniments. While the crispy, golden fish and the tender yet crunchy chips take center stage, the side dishes you choose can elevate the dining experience. Whether you’re sticking to a lectin-free diet or want to explore unique and complementary flavors, here are some excellent side dish ideas that pair beautifully with your lectin-free fish and chips recipe.
1. Classic Alternatives with a Lectin-Free Twist
- Homemade Coleslaw
A fresh, crunchy coleslaw can provide the perfect contrast to the rich, fried flavors of fish and chips. Opt for a lectin-free coleslaw by using cabbage, carrots, and a dressing made from avocado oil mayo, apple cider vinegar, and a touch of honey or monk fruit sweetener.- Tip: Add shredded purple cabbage for a pop of color and extra antioxidants.
- Tartar Sauce
No fish dish feels complete without a tangy tartar sauce. Create a lectin-free version using avocado oil mayo, chopped pickles (choose sugar-free, lectin-free options), capers, fresh dill, and a squeeze of lemon.- Tip: Add a pinch of garlic powder or Dijon mustard for extra flavor depth.
- Pickled Vegetables
Pickled cucumbers, onions, or radishes provide a tangy and refreshing side dish that cuts through the richness of the fried fish. Opt for lectin-free vinegars like apple cider vinegar or white vinegar to keep it gut-friendly.
2. Low-Carb and Keto-Friendly Options
- Zucchini Fries
For those looking to keep things low-carb, zucchini fries are an excellent alternative to traditional chips. Coat them in almond flour and bake or air fry for a crispy, lectin-free side.- Tip: Serve with a garlic aioli for an indulgent yet healthy dipping option.
- Cauliflower Mash
A creamy cauliflower mash can serve as a comforting and satisfying side. Steam cauliflower florets, blend them with ghee or butter, garlic, and salt, and you have a buttery, velvety alternative to mashed potatoes. - Avocado Salad
A simple avocado salad with diced tomatoes, cucumbers, and a drizzle of olive oil and lemon juice makes a refreshing, low-carb complement to your fish and chips.- Tip: Sprinkle with fresh herbs like cilantro or parsley for added freshness.
3. Vegetable-Based Side Dishes
- Steamed Asparagus
Asparagus is a nutrient-rich vegetable that pairs beautifully with fish. Steam lightly, then toss with olive oil, lemon zest, and a pinch of sea salt.- Tip: For a more decadent touch, drizzle with a lectin-free hollandaise sauce made from ghee, egg yolks, and lemon juice.
- Roasted Brussels Sprouts
Roast halved Brussels sprouts in avocado oil and season with garlic powder, paprika, and a sprinkle of sea salt for a crispy, caramelized side dish.- Tip: Add a touch of balsamic vinegar or grated Parmesan (if tolerated) for extra flavor.
- Grilled Veggie Skewers
Skewer cherry tomatoes, bell peppers, zucchini, and onions, and grill them for a smoky, colorful side that complements the fried fish. Brush with olive oil and season with herbs for an added flavor boost.
4. Unique and Gourmet Additions
- Sweet Potato Chips
For a sweeter take on chips, bake or air fry thinly sliced sweet potatoes. Coat them in a light layer of olive oil and sprinkle with sea salt or cinnamon for a delightful side.- Tip: Sweet potato chips also pair wonderfully with spicy or tangy dipping sauces.
- Cucumber Dill Salad
Thinly sliced cucumbers dressed in a light vinaigrette with fresh dill and lemon juice create a cooling side that complements the crispy fish. Add thinly sliced onions for extra crunch. - Lectin-Free Garlic Bread
Make garlic bread using a lectin-free bread substitute, such as cassava or almond flour bread. Toast it and rub it with fresh garlic, then drizzle with olive oil or spread on some herb-infused ghee.
5. Dipping Sauces and Extras
- Avocado Dip
Blend ripe avocados with lime juice, garlic, and a pinch of sea salt for a creamy and refreshing dip. It’s a perfect pairing for both the fish and the chips. - Spicy Remoulade
Combine avocado mayo with paprika, garlic, mustard, and a touch of hot sauce for a spicy kick. This sauce works well for those who enjoy a bit of heat in their meals. - Fermented Vegetables
Add a gut-boosting element to your meal with fermented vegetables like sauerkraut or kimchi. They offer a tangy, probiotic-rich accompaniment that’s both tasty and healthy.
By including these side dishes, you can transform your lectin-free fish and chips into a complete and satisfying meal. Whether you prefer traditional options, low-carb alternatives, or gourmet additions, these sides provide variety and enhance the flavors of the dish while keeping it health-conscious and delicious.
Step-by-Step Guide to Making Lectin-Free Fish and Chips
1. Prepare the Batter
The batter is the star of any fish and chips recipe, creating the signature crispy coating that makes the dish so irresistible. For a lectin-free version, traditional flours like wheat or cornmeal are replaced with alternative ingredients that deliver the same crunch without the harmful effects of lectins. Here’s a step-by-step guide to preparing the perfect lectin-free batter for your fish.
1. Choose Your Flour Alternative
The base of your batter starts with selecting a lectin-free flour. Each type has its own unique qualities, so you can tailor the batter to your taste and dietary preferences.
- Cassava Flour: This flour is made from the whole root of the cassava plant and is naturally gluten-free and lectin-free. It creates a light and airy batter with a neutral flavor.
- Tip: Blend cassava flour with a small amount of arrowroot powder for extra crispiness.
- Almond Flour: Almond flour adds a nutty flavor to the batter and works well for those following a paleo or keto diet. Combine it with another flour, like coconut flour, to achieve the right consistency.
- Tip: Use finely ground almond flour for a smoother batter.
- Coconut Flour: Coconut flour is absorbent, so it’s often mixed with other flours. It creates a subtly sweet batter that pairs beautifully with white fish.
- Tip: Use sparingly: too much coconut flour can make the batter dense.
- Chickpea Flour: Also known as gram flour, this option is both gluten-free and lectin-free, creating a slightly earthy batter that fries up golden and crisp.
2. Add the Liquids
The right liquid helps bind the dry ingredients and creates a batter that sticks to the fish without being too thick or runny.
- Sparkling Water: The carbonation in sparkling water lightens the batter, creating a crisp and airy texture.
- Tip: Use chilled sparkling water to keep the batter cold, which helps it fry better.
- Eggs: Eggs add richness and help the batter adhere to the fish. Beat the eggs lightly before adding them to the batter.
- Tip: For an egg-free option, use flaxseed or chia seed gel as a binder.
- Non-Dairy Milk: For a creamy batter, use unsweetened almond milk or coconut milk. Ensure it’s free of additives that might contain lectins.
3. Season the Batter
Seasoning is key to enhancing the flavor of the fish and making the batter truly stand out.
- Salt and Pepper: A pinch of sea salt and freshly ground black pepper are essential for flavor balance.
- Garlic and Onion Powder: These add depth and a savory kick to the batter.
- Paprika: Sweet or smoked paprika gives the batter a subtle warmth and beautiful color.
- Herbs: Dried parsley, thyme, or oregano can add an aromatic touch.
- Tip: For a hint of spice, include cayenne pepper or chili powder.
4. Adjust the Consistency
The batter should be thick enough to coat the fish evenly but not so thick that it overpowers the delicate texture of the fish.
- Test the Batter: Dip a spoon into the batter and lift it out. The batter should cling to the spoon without dripping off too quickly.
- Thicken if Needed: If the batter is too thin, add more flour, one tablespoon at a time, until you achieve the desired consistency.
- Thin it Out: If the batter is too thick, add small amounts of sparkling water or milk to loosen it.
5. Chill the Batter
Allowing the batter to rest and chill in the refrigerator for 15–30 minutes before use improves its texture and frying performance.
- Why Chill?: Cold batter reacts better with hot oil, creating a crispier coating.
- Quick Tip: Prepare the batter just before frying for the best results, as leaving it too long can affect its texture.
6. Coat the Fish
Once the batter is ready, it’s time to coat the fish. Proper coating ensures an even fry and a perfectly crispy texture.
- Step 1: Pat the fish fillets dry with a paper towel to remove excess moisture. This helps the batter adhere better.
- Step 2: Lightly dust the fish with a small amount of flour (use the same flour as in the batter) before dipping it into the batter.
- Tip: This step creates a base layer that helps the batter stick.
- Step 3: Dip each piece of fish into the batter, ensuring it is fully coated. Let any excess batter drip off before frying.
By following these steps, you’ll create a light, crispy, and flavorful batter that perfectly complements the fish. Whether you’re using cassava flour for a traditional texture or almond flour for a nutty twist, this lectin-free batter will deliver delicious results every time!
2. Coat the Fish
Coating the fish is a crucial step in making lectin-free fish and chips. A well-coated fish ensures that the batter clings evenly, resulting in a golden, crispy exterior and a moist, flaky interior. Achieving the perfect coating involves preparation, technique, and attention to detail. Here’s a step-by-step guide to coating your fish for the ultimate fried dish.
1. Prepare the Fish Fillets
Start with fresh or properly thawed fish fillets to ensure the best texture and taste.
- Dry the Fillets:
Pat the fish fillets dry with paper towels to remove any excess moisture. This step is essential because moisture can prevent the batter from adhering evenly, leading to a patchy coating.- Tip: Drying the fish also helps avoid excess splattering when frying.
- Cut into Portions:
Depending on the size of the fillets, you may want to cut them into smaller portions for easier handling and more even frying. - Season the Fish:
Lightly season the fish with salt, pepper, and any desired spices before coating. This step enhances the flavor and ensures the fish is tasty even beneath the batter.- Tip: Let the seasoned fish sit for a few minutes to absorb the flavors before moving to the next step.
2. Pre-Coat with Dry Ingredients
Before dipping the fish into the batter, a light dusting of flour or other dry ingredients helps create a base layer for the batter to stick to.
- Use the Same Flour:
Use the same lectin-free flour you chose for the batter, such as cassava, almond, or chickpea flour. This ensures consistency in flavor and texture. - Light Dusting:
Place the flour in a shallow dish and lightly coat each piece of fish, shaking off any excess. The goal is to create a thin, even layer of flour.- Tip: For added flavor, mix in a pinch of garlic powder, paprika, or dried herbs with the flour.
3. Dip into the Batter
With the fish prepped and the batter ready, it’s time to dip.
- Immerse Fully:
Hold the fish by the edges and gently immerse it into the batter, ensuring every part is coated. Use a fork or tongs for easier handling.- Tip: Avoid over-dipping, as a thick layer of batter can overpower the fish and become soggy during frying.
- Remove Excess Batter:
Lift the fish out of the batter and allow any excess to drip off back into the bowl. A thin, even layer of batter fries better and creates a crispier texture.
4. Double-Coating Option
For an extra crispy result, consider a double-coating technique.
- Step 1: After dipping the fish in the batter, roll it lightly in additional dry flour or breading (lectin-free options like crushed pork rinds or almond flour).
- Step 2: Dip it back into the batter for a final coat.
- Tip: This step is optional but highly effective for those who love an ultra-crunchy exterior.
5. Handle with Care
Coated fish is delicate, and rough handling can cause the batter to slide off.
- Lay Gently in the Fryer:
When frying, place the fish into the oil gently. Lower it slowly into the hot oil to avoid splattering and to maintain the integrity of the coating.- Tip: Use a spatula or tongs to support the fish if needed.
- Don’t Overcrowd:
Fry in small batches to avoid the pieces sticking together and to maintain the oil temperature. Crowding the fryer can lead to uneven cooking and less crispy results.
6. Let the Coating Set
If you’re not frying immediately, allow the coated fish to rest for a few minutes.
- Why Rest?:
Resting helps the batter set, ensuring it sticks better during frying. Place the coated fish on a wire rack or parchment-lined tray to prevent sticking. - Quick Tip:
If you need to wait longer before frying, place the coated fish in the refrigerator for up to 30 minutes. The cold batter will react better with the hot oil, creating a crispier coating.
By carefully following these steps, you can achieve a perfectly coated fish with a crispy, flavorful crust. Whether you’re using a single coat for a light crunch or opting for a double-coating for extra texture, this process ensures that your lectin-free fish and chips recipe delivers on taste and quality.
3. Frying or Baking the Fish
How you cook your lectin-free fish and chips can significantly impact the texture, flavor, and overall healthiness of the dish. Both frying and baking have their unique benefits, and the method you choose depends on your preferences for crispiness, ease, and health-conscious cooking. Here’s a detailed guide to both techniques to help you decide and execute the perfect preparation.
1. Frying the Fish
Frying is the traditional method for cooking fish and chips, delivering that signature golden, crispy exterior.
a. Choose the Right Oil
- Healthy Options: Opt for oils with a high smoke point and neutral flavor, such as avocado oil, coconut oil, or ghee. These oils are heat-stable and free from harmful lectins.
- Tip: Avoid vegetable oils like canola or soybean oil, which may contain lectins and are less healthy for frying.
b. Heat the Oil
- Use a deep fryer, a Dutch oven, or a heavy-bottomed pan to fry the fish.
- Heat the oil to approximately 350°F to 375°F (175°C to 190°C). Maintaining this temperature ensures the batter crisps up quickly without absorbing excess oil.
- Tip: Use a kitchen thermometer to monitor the oil temperature. Overheated oil can burn the coating, while cooler oil may result in soggy fish.
c. Fry the Fish
- Gently place the coated fish into the hot oil, one piece at a time.
- Fry in small batches to prevent crowding and maintain the oil’s temperature.
- Cook each piece for 3–5 minutes, depending on the thickness, until the batter is golden brown and the fish is cooked through.
- Tip: Flip the fish halfway through for even cooking.
d. Drain Excess Oil
- Use a slotted spoon or tongs to remove the fish from the oil.
- Place the fried fish on a wire rack or a plate lined with paper towels to drain any excess oil. This helps maintain crispiness.
2. Baking the Fish
Baking offers a lighter, lower-fat alternative to frying while still delivering great flavor and crispiness with the right technique.
a. Prepare a Baking Tray
- Line a baking tray with parchment paper or lightly grease it with a lectin-free oil like avocado or olive oil.
- Tip: Use a wire rack on top of the baking tray for even cooking and to prevent the batter from getting soggy on the bottom.
b. Preheat the Oven
- Preheat your oven to 425°F to 450°F (220°C to 230°C). A hot oven helps create a crispy exterior.
c. Arrange the Fish
- Place the coated fish fillets on the prepared tray, ensuring there’s space between each piece.
- Tip: For extra crispiness, lightly brush the tops of the fish with oil.
d. Bake Until Golden
- Bake the fish for 15–20 minutes, flipping halfway through to ensure even browning.
- Check for doneness by ensuring the batter is golden and the fish flakes easily with a fork.
- Tip: Use the broiler for the last 2–3 minutes for an extra-crispy finish.
3. Comparing Frying and Baking
| Aspect | Frying | Baking |
|---|---|---|
| Texture | Extra crispy exterior, moist interior | Crispy exterior, slightly drier interior |
| Healthiness | Higher in fat and calories due to oil | Lower in fat and calories, lighter option |
| Flavor | Rich, indulgent, traditional taste | Subtler flavor, emphasizes natural fish taste |
| Ease of Cleanup | Requires oil disposal, can be messy | Minimal cleanup, no oil disposal needed |
4. Tips for Both Methods
- Preheat the Cooking Medium: Whether oil or oven, preheating is crucial for a crisp coating and even cooking.
- Avoid Overcrowding: Both frying and baking require space for proper airflow and heat distribution.
- Serve Immediately: For the best texture and flavor, serve the fish as soon as it’s cooked.
By understanding the nuances of frying and baking, you can choose the method that best suits your taste and dietary goals. Whether you prefer the classic crunch of frying or the lighter, health-focused approach of baking, your lectin-free fish and chips will be a delicious and satisfying meal!
4. Cooking the Chips
The chips or fries are an essential part of any fish and chips recipe, and they can make or break the dish. For a lectin-free fish and chips experience, the focus shifts to choosing the right potatoes (or alternatives), preparing them correctly, and cooking them to achieve the perfect balance of crispiness and fluffiness. Here’s a detailed guide to cooking the ideal chips for your meal.
1. Choosing Your Potatoes or Alternatives
Traditional chips are made with starchy potatoes, but for a lectin-free version, it’s important to select options that align with your dietary preferences.
- White Potatoes (Optional): If you choose to use white potatoes, ensure they are peeled, as the skin contains most of the lectins. However, some people following a lectin-free diet avoid white potatoes altogether.
- Tip: Russet or Yukon Gold potatoes work best for traditional chips due to their starch content.
- Sweet Potatoes: A lectin-free alternative that’s naturally sweet and nutrient-rich. Peel them to ensure they’re fully compliant.
- Tip: Choose firmer varieties for better frying or baking.
- Other Alternatives:
- Yucca (Cassava): A starchy root vegetable that fries up beautifully and is entirely lectin-free.
- Parsnips: Slightly sweet and nutty, these make for a unique chip alternative.
- Zucchini or Carrot Fries: For a lighter, non-starchy option, zucchini or carrot fries can complement your fish.
2. Preparing the Chips
Proper preparation is the key to achieving restaurant-quality chips at home.
a. Peel and Cut
- Peel your chosen potatoes or alternatives, removing any blemishes or imperfections.
- Cut into uniform sticks for even cooking. Aim for pieces about 1/4 to 1/2 inch thick.
- Tip: For a rustic look, you can leave the peel on non-potato alternatives like parsnips or carrots.
b. Soak the Chips
- Soak the cut chips in cold water for 30 minutes to an hour. This step removes excess starch, helping the chips crisp up when cooked.
- Tip: Add a pinch of salt to the soaking water to enhance flavor.
c. Dry Thoroughly
- After soaking, drain the chips and pat them completely dry with a clean kitchen towel or paper towels. Wet chips can cause oil splattering and soggy fries.
3. Cooking Methods
You can cook your chips using either frying or baking, depending on your desired texture and dietary goals.
a. Frying the Chips
Frying yields the crispiest results, making it the traditional choice.
- Step 1: Heat your oil to 350°F to 375°F (175°C to 190°C). Use a neutral, high-smoke-point oil like avocado oil, coconut oil, or ghee.
- Step 2: Fry the chips in batches, ensuring they aren’t crowded in the oil.
- Step 3: Cook for 4–6 minutes until they’re golden and crispy. Remove with a slotted spoon and drain on a paper towel-lined plate.
- Tip: Double-frying enhances crispiness. For this method, fry once at a lower temperature (325°F/160°C) to cook the insides, then a second time at 375°F/190°C to crisp the outside.
b. Baking the Chips
Baking is a healthier alternative that still delivers satisfying crispiness with the right technique.
- Step 1: Preheat the oven to 425°F to 450°F (220°C to 230°C).
- Step 2: Toss the chips with a small amount of lectin-free oil, like avocado or olive oil, and season with salt and pepper.
- Step 3: Arrange the chips in a single layer on a parchment-lined baking tray, ensuring no overlap.
- Step 4: Bake for 25–30 minutes, flipping halfway through for even browning.
- Tip: For extra crispiness, use a wire rack over the baking tray to promote airflow.
c. Air Fryer Option
For a combination of convenience and healthiness, the air fryer is an excellent option.
- Step 1: Preheat the air fryer to 375°F (190°C).
- Step 2: Lightly coat the chips with oil and arrange them in a single layer in the air fryer basket.
- Step 3: Cook for 15–20 minutes, shaking the basket halfway through.
4. Seasoning and Serving
Once cooked, the chips are ready to be seasoned and served alongside your fish.
- Classic Seasonings: Toss the chips with sea salt and a pinch of black pepper while they’re still hot.
- Creative Options: Add a sprinkle of smoked paprika, garlic powder, or dried herbs like parsley or thyme for a flavor boost.
- Tip: For a spicy kick, toss with a pinch of cayenne pepper or chili powder.
5. Pairing with Dips
No plate of chips is complete without a delicious dip! Consider these lectin-free options:
- Garlic Aioli: A creamy, flavorful dip made with olive oil, garlic, and egg yolks.
- Avocado Dip: Mash ripe avocados with lime juice, salt, and a touch of garlic for a refreshing pairing.
- Tahini Sauce: A nutty, savory dip made from sesame paste, lemon juice, and a bit of olive oil.
By following these steps, you’ll create perfectly crispy, flavorful chips to accompany your fish. Whether you choose to fry or bake, your chips will be the ideal sidekick for your lectin-free fish and chips recipe, offering a satisfying crunch and a delicious complement to the meal.
Tips for Perfecting Your Lectin-Free Fish and Chips
1. Achieving Crispy Coating
The hallmark of an exceptional lectin-free fish and chips recipe is a perfectly crispy coating that encases the tender, flaky fish. Achieving this balance requires the right combination of ingredients, technique, and attention to detail. Here’s how to master the art of creating a crispy, golden coating every time.
1. The Role of Ingredients
Choosing the right ingredients for your coating is essential. Since this is a lectin-free recipe, traditional wheat flour is off the table, but there are excellent alternatives that deliver similar, if not superior, results.
a. Flour Alternatives
- Cassava Flour: A gluten-free, lectin-free option that mimics the texture of traditional wheat flour.
- Almond Flour: Provides a slightly nutty flavor and works well for a low-carb, lectin-free coating.
- Coconut Flour: Absorbs moisture effectively, contributing to a crispy texture, though it may need to be combined with other flours for balance.
- Chickpea Flour (Optional): Naturally gluten-free and adds a rich, earthy flavor, though it should be used sparingly for those avoiding legumes.
b. Binding Agents
- Egg Wash: A mixture of beaten eggs and a splash of water or milk (dairy-free if needed) ensures the coating adheres to the fish.
- Sparkling Water or Club Soda: Incorporating this into the batter creates lightness, contributing to a delicate, crispy texture.
c. Seasonings
Flavorful seasoning enhances the coating without overwhelming the fish.
- Sea salt, black pepper, garlic powder, smoked paprika, or cayenne for a spicy kick.
- Tip: Add dried herbs like dill, parsley, or thyme for a subtle, herbaceous flavor.
2. Preparing the Batter
The batter is a key element in achieving crispiness. It should be light, airy, and well-seasoned.
- Mix your chosen flour alternative with baking powder or baking soda to add lift and create a delicate crunch.
- Add sparkling water or club soda gradually to the dry ingredients, whisking until the batter is smooth and slightly thick.
- Tip: A batter that’s too thin won’t cling well to the fish, while a batter that’s too thick may turn gummy. Aim for a consistency similar to pancake batter.
3. Coating Technique
How you coat the fish plays a significant role in the final texture.
a. Pat the Fish Dry
- Use paper towels to thoroughly dry the fish fillets. This helps the batter adhere and prevents the coating from becoming soggy.
b. Light Dusting of Flour
- Lightly dredge the fish in cassava flour (or your chosen alternative) before dipping it in the batter. This creates a base layer that helps the batter stick better.
c. Even Coating
- Dip the fish into the prepared batter, ensuring it is evenly coated.
- Allow any excess batter to drip off to avoid a thick, uneven coating.
4. Cooking for Crispiness
The cooking method you choose (frying or baking) impacts the crispiness of the coating.
a. Frying
- Use oil heated to the correct temperature (around 350°F to 375°F). This ensures the batter crisps up quickly without absorbing too much oil.
- Avoid crowding the pan, as this lowers the oil temperature and results in soggy coating.
b. Baking
- Preheat your oven to 425°F to 450°F and use a wire rack on a baking tray for optimal airflow.
- Lightly brush the coated fish with oil before baking to promote crispiness.
c. Air Frying
- Preheat the air fryer to 375°F and cook the fish in a single layer. Flip halfway through for even browning.
5. Finishing Touches
For the ultimate crispiness, consider these finishing tips:
- Drain Properly: After frying, place the fish on a wire rack to allow excess oil to drain. Avoid using paper towels, which can trap steam and make the coating less crispy.
- Serve Immediately: The coating is at its crispiest right after cooking, so serve the fish while it’s hot.
6. Troubleshooting Common Issues
- Soggy Coating: This can happen if the batter is too thick, the oil isn’t hot enough, or the fish isn’t patted dry before coating.
- Batter Falling Off: Ensure the fish is dry, and use a light dusting of flour before applying the batter.
By following these tips and techniques, you’ll achieve a perfectly crispy coating that elevates your lectin-free fish and chips recipe to restaurant-quality status. Whether you’re frying, baking, or air frying, your fish will have a satisfying crunch that complements the tender, flaky interior.
2. Oil Temperature Matters
The temperature of the oil plays a critical role in achieving perfectly crispy and golden fish and chips. Too hot, and the coating burns before the fish cooks through; too cool, and the coating absorbs excess oil, resulting in soggy, greasy fish. Mastering the ideal frying temperature ensures a balance between crispness and proper cooking. Here’s an in-depth guide to understanding and managing oil temperature.
1. The Science Behind Oil Temperature
When food is placed in hot oil, the water content in the batter and the fish begins to evaporate, creating steam. This steam pushes against the coating, making it crispy and forming a protective barrier that prevents the oil from penetrating too deeply.
- Optimal Frying Temperature: 350°F to 375°F (175°C to 190°C)
- At this range, the batter crisps up quickly, locking in moisture and flavor.
- Lower temperatures result in longer frying times, which can lead to soggy food.
- Higher temperatures can burn the coating while leaving the inside undercooked.
2. Tools for Monitoring Oil Temperature
Consistently maintaining the correct temperature is easier with the right tools:
- Deep-Fry Thermometer: A simple and accurate way to monitor oil temperature in real-time.
- Electric Deep Fryer: Many models come with built-in thermostats for precise temperature control.
- Wooden Spoon Test: If you don’t have a thermometer, dip the handle of a wooden spoon into the oil. If bubbles form steadily around it, the oil is ready. If it bubbles violently, the oil is too hot.
3. Managing Oil Temperature During Cooking
Oil temperature fluctuates as food is added and removed, so managing it effectively is essential.
- Don’t Overcrowd the Pan: Adding too many pieces of fish or chips at once can lower the oil temperature significantly, resulting in uneven cooking. Fry in small batches for best results.
- Allow Oil to Recover: After removing a batch of food, let the oil return to the optimal temperature before adding the next batch.
- Adjust Heat as Needed: Use medium to medium-high heat on the stovetop and monitor closely, as prolonged frying can cause oil to overheat.
4. Tips for Maintaining Quality and Safety
Oil quality and safety are just as important as the temperature itself:
a. Choose the Right Oil
- Use oils with a high smoke point, such as avocado oil, coconut oil, or ghee. These oils maintain their integrity at higher temperatures, reducing the risk of burning or developing off flavors.
b. Avoid Reusing Oil Excessively
- Repeated use of the same oil can lead to the accumulation of burned particles and unpleasant flavors. Strain the oil after each use and store it properly to extend its life.
c. Watch for Signs of Overheating
- If oil starts smoking or smells burnt, it has overheated and should be discarded. Using overheated oil can impart a bitter taste to the food and produce harmful compounds.
5. Troubleshooting Temperature Issues
Oil Too Cool
- Signs: The batter turns greasy or soggy, and the food absorbs excess oil.
- Solution: Increase the heat and check the temperature with a thermometer.
Oil Too Hot
- Signs: The coating browns or burns too quickly, while the interior remains undercooked.
- Solution: Lower the heat and allow the oil to cool slightly before continuing.
6. Alternatives to Frying
For those who prefer not to fry, other methods can achieve a crispy coating without managing oil temperature:
- Air Fryer: Uses hot air circulation to mimic frying at a consistent temperature.
- Oven-Baking: Coat the fish lightly with oil and bake in a preheated oven for a crispy result.
By paying attention to oil temperature and making small adjustments as needed, you’ll ensure that your lectin-free fish and chips recipe turns out perfectly crispy, light, and flavorful every time. Temperature control is the key to mastering this classic dish with a healthy twist!
3. Flavor Enhancements
One of the joys of making lectin-free fish and chips is the opportunity to add personal touches that elevate the flavor of this classic dish. From incorporating bold seasonings into the batter to pairing the dish with unique dips and sides, flavor enhancements can turn a simple meal into an unforgettable dining experience. Here’s how you can take your fish and chips to the next level.
1. Seasoning the Batter
The batter is a perfect canvas for infusing your fish with rich flavors. While keeping the recipe lectin-free, you can customize the taste to match your preferences.
a. Essential Seasonings
- Sea Salt: Enhances the natural flavors of the fish.
- Black Pepper: Adds a mild heat and depth to the batter.
- Garlic Powder: Provides a subtle, savory undertone.
- Smoked Paprika: Adds a smoky flavor and a hint of sweetness.
b. Creative Twists
- Cayenne Pepper: For a spicy kick.
- Dried Herbs: Dill, thyme, or parsley can add a fresh, aromatic note.
- Lemon Zest: Grated lemon peel can brighten the flavor and complement the fish.
- Cumin or Coriander: Add an earthy, slightly citrusy flavor for a unique twist.
2. Marinades and Rubs
Before battering, consider marinating or seasoning the fish fillets for an extra layer of flavor:
- Simple Marinade: Combine olive oil, lemon juice, minced garlic, and fresh herbs like dill or parsley. Let the fish marinate for 20-30 minutes.
- Dry Rub: Use a blend of salt, pepper, smoked paprika, and garlic powder to season the fillets directly.
3. Enhancing the Chips
The chips, often overshadowed by the fish, can also shine with a few simple upgrades:
a. Seasonings
- Truffle Salt: Adds an earthy, luxurious flavor.
- Rosemary and Garlic: Toss chips with fresh rosemary and minced garlic before baking or frying.
- Chili Powder: For a spicy edge that pairs well with the fish.
b. Cooking Techniques
- Parboil the potato wedges before frying or baking for a fluffy interior.
- Double-fry for maximum crispiness and an added crunch.
4. Dips and Sauces
Serve your fish and chips with a variety of flavorful, lectin-free dips to enhance the meal:
a. Traditional Options
- Homemade Tartar Sauce: A creamy, tangy dip made with mayonnaise, chopped pickles, capers, and lemon juice.
- Malt Vinegar Substitute: A mix of apple cider vinegar and a touch of honey for a tangy drizzle.
b. Creative Alternatives
- Garlic Aioli: A rich and garlicky sauce perfect for dipping.
- Spicy Mayo: Mayonnaise mixed with hot sauce or Sriracha for a spicy flair.
- Herb Yogurt Dip: Greek yogurt blended with fresh herbs, garlic, and lemon juice for a refreshing contrast.
5. Garnishes and Finishing Touches
The final touches can make your dish visually appealing and add bursts of flavor:
- Fresh Herbs: Sprinkle chopped parsley, cilantro, or chives over the finished dish.
- Lemon Wedges: Serve alongside for a zesty burst of freshness.
- Sea Salt Flakes: Add a light crunch and enhance the overall flavor.
6. Pairing Suggestions
Enhance the meal experience by pairing your fish and chips with complementary side dishes or beverages:
- Coleslaw: A crunchy, tangy coleslaw provides a refreshing contrast to the rich, crispy fish.
- Steamed Vegetables: Add a healthy balance with lightly steamed broccoli or green beans.
- Citrusy Beverages: Serve with a glass of sparkling water infused with lemon or lime, or a light, crisp white wine.
With these flavor enhancements, your lectin-free fish and chips recipe will not only satisfy but impress. Whether you’re cooking for yourself, your family, or guests, these tips will help you create a dish that’s bursting with flavor and tailored to your taste.
4. Serving Suggestions
Once you’ve perfected your lectin-free fish and chips, the final step is to serve it in a way that enhances the meal experience. From plating ideas to complementary accompaniments, thoughtful serving suggestions can turn this dish into a delightful feast. Here’s how to make the most of your presentation and pairings.
1. Plating Like a Pro
The way you present your fish and chips can elevate the meal:
a. Classic Presentation
- Newspaper Lining: For a nostalgic touch, serve the fish and chips on parchment paper designed to resemble vintage newsprint. This pays homage to the traditional British style.
- Wooden Board or Basket: Add a rustic vibe by plating on a wooden board or in a wire basket. Line with parchment or wax paper for easy cleanup.
b. Elegant Twist
- Individual Plates: Arrange the fish and chips neatly with a small ramekin of dipping sauce and a lemon wedge. Garnish with fresh herbs for a pop of color.
- Layered Serving: Place chips as a base, topped with the crispy fish, and drizzle with a complementary sauce for a modern presentation.
2. Dips and Sauces
Offer a variety of lectin-free dips to enhance the flavors:
- Tartar Sauce: A creamy classic made with mayonnaise, pickles, capers, and a squeeze of lemon juice.
- Garlic Aioli: Perfect for dipping both the fish and chips, this rich sauce adds a garlicky kick.
- Spicy Mayo: Add a hint of heat with mayonnaise mixed with Sriracha or your favorite hot sauce.
- Lemon Herb Yogurt: A refreshing dip made from Greek yogurt blended with fresh herbs and lemon juice.
3. Side Dish Pairings
Balance the rich and crispy fish and chips with sides that complement the dish:
a. Fresh and Light Options
- Garden Salad: A mix of leafy greens, cherry tomatoes, and cucumbers tossed with a simple olive oil and lemon vinaigrette.
- Coleslaw: A creamy or vinegar-based coleslaw adds crunch and a refreshing tang.
- Steamed or Grilled Vegetables: Broccoli, green beans, or zucchini are great healthy accompaniments.
b. Comfort Sides
- Baked Beans: For a hearty addition, serve a small bowl of warm baked beans on the side.
- Mashed Peas: Traditional British mushy peas, made lectin-free with split yellow peas, offer a soft, earthy contrast.
- Sweet Potato Fries: A healthier twist on traditional chips, these can be baked or air-fried for extra crispiness.
4. Garnishes
Add simple yet effective garnishes to enhance the dish visually and flavorfully:
- Fresh Herbs: Sprinkle chopped parsley, dill, or cilantro over the fish and chips for a touch of freshness.
- Lemon Wedges: Serve alongside the fish for a zesty burst that enhances the flavor.
- Flaky Sea Salt: Add a final sprinkle of sea salt for a subtle crunch and boost of flavor.
5. Beverage Pairings
A good drink pairing can elevate the meal further:
a. Non-Alcoholic Options
- Sparkling Water with Citrus: Infuse sparkling water with slices of lemon, lime, or cucumber for a refreshing drink.
- Iced Tea: Unsweetened iced tea with a hint of lemon complements the dish well.
b. Alcoholic Pairings
- Light White Wine: A crisp Sauvignon Blanc or Pinot Grigio pairs beautifully with the light, flaky fish.
- Craft Beer: Choose a pale ale or light lager to balance the richness of the dish.
6. Family-Style Serving
If you’re serving a group, consider these options:
- Sharing Platter: Arrange the fish, chips, and dips on a large platter for a communal dining experience.
- Self-Serve Station: Set up a table with all the components: fish, chips, sauces, and sides (so everyone can build their perfect plate).
With these serving suggestions, your lectin-free fish and chips will not only taste incredible but also look and feel like a restaurant-quality meal. Whether you’re hosting a casual dinner or enjoying a quiet night in, these ideas will help you create a memorable experience.
FAQs About Lectin-Free Fish and Chips
1. What Makes This Recipe Lectin-Free?
This lectin-free fish and chips recipe has been thoughtfully crafted to align with the dietary needs of those following a lectin-free lifestyle. Lectins, naturally occurring proteins found in many plant-based foods, can sometimes cause digestive issues and inflammation in sensitive individuals. By choosing specific ingredients and preparation methods, this recipe eliminates lectins without compromising flavor or texture. Here’s how this recipe achieves its lectin-free status.
1. Avoiding High-Lectin Ingredients
a. Traditional Batter Substitutions
Traditional fish and chips batter often uses wheat flour, which contains gluten and lectins. In this recipe:
- Grain-Free Flours: Alternatives like almond flour, cassava flour, or coconut flour are used to replace wheat-based flours. These options are naturally lectin-free and provide a crispy texture.
- Arrowroot or Tapioca Starch: These are excellent for achieving a light and crispy coating while remaining lectin-free.
b. Chips (Fries) Preparation
Standard potatoes, particularly white potatoes, are part of the nightshade family and contain lectins. This recipe substitutes:
- Sweet Potatoes (Peeled): For a naturally sweet and lectin-free option.
- Yuca (Cassava): A starchy, lectin-free root vegetable that fries up beautifully.
2. Cooking Oils with High Smoke Points
Many vegetable oils, such as canola or soybean oil, are not lectin-free and are often processed in a way that diminishes their nutritional value. This recipe opts for:
- Avocado Oil: A healthy, high-smoke-point oil ideal for frying.
- Coconut Oil: Another great choice for its stability at high temperatures and light flavor.
- Ghee (Clarified Butter): Lactose-free and lectin-free, ghee adds a rich, buttery taste to the dish.
3. Emphasis on High-Quality, Lectin-Free Ingredients
a. Fish Selection
The fish itself is naturally lectin-free, but choosing wild-caught options ensures higher quality and fewer contaminants compared to farm-raised alternatives.
b. Seasonings
All seasonings and spices used in the recipe, such as garlic powder, smoked paprika, and sea salt, are chosen for their lectin-free properties.
4. Preparation Techniques to Reduce Lectins
Even foods that contain lectins can sometimes be made safe through proper preparation:
- Peeling Vegetables: The skins of some vegetables, like sweet potatoes, contain the majority of their lectins. By peeling them, you ensure they are fully lectin-free.
- Pressure Cooking: While not needed for this recipe, pressure cooking is a common method to neutralize lectins in beans and certain vegetables.
5. Compatibility with Popular Diet Plans
This recipe fits seamlessly into various lectin-free diet protocols, such as:
- The Plant Paradox Diet: Developed by Dr. Steven Gundry, this diet avoids high-lectin foods while emphasizing nutrient-dense, lectin-free alternatives.
- Paleo and Grain-Free Diets: The use of grain-free flours and natural ingredients makes this dish suitable for these diets as well.
6. Beyond the Basics: Why It Matters
Eliminating lectins from this recipe isn’t just about adhering to dietary restrictions; it’s about creating a meal that is:
- Easier to Digest: Avoiding lectins can reduce bloating, gas, and discomfort in those with sensitivities.
- Anti-Inflammatory: A lectin-free meal may help reduce inflammation and promote gut health.
- Flavorful and Satisfying: By focusing on quality ingredients and innovative cooking techniques, this recipe proves that dietary adjustments don’t mean sacrificing taste.
Key Takeaway
This recipe ensures that every element—from the fish to the chips and even the oil—has been carefully chosen to align with a lectin-free lifestyle. The result is a dish that’s not only healthier but also packed with flavor and texture, offering a guilt-free twist on the beloved classic. Whether you’re managing food sensitivities or simply exploring new ways to eat healthier, this lectin-free fish and chips recipe is a delicious choice!
2. Can I Use Other Types of Flour?
Absolutely! One of the great aspects of making lectin-free fish and chips is the flexibility to experiment with different types of flours. Traditional wheat flour, often used for battering fish, contains gluten and lectins, making it unsuitable for those following a lectin-free diet. Thankfully, there are numerous flour alternatives that not only fit into a lectin-free lifestyle but also provide unique textures and flavors. Let’s explore the best options and how to use them effectively.
1. Almond Flour
Almond flour is a popular choice for lectin-free cooking and works exceptionally well in batters:
- Texture: Produces a slightly nutty flavor and a light, crispy coating.
- Benefits: Rich in protein, healthy fats, and vitamin E, almond flour adds nutritional value to your dish.
- Tips for Use: Combine almond flour with arrowroot or tapioca starch to create a more cohesive batter, as almond flour alone can be too crumbly.
2. Coconut Flour
Coconut flour is another versatile option, particularly for those who prefer a mild, slightly sweet flavor in their batter:
- Texture: Absorbs more liquid than other flours, resulting in a denser coating.
- Benefits: High in fiber and low in carbohydrates, it’s great for those watching their carb intake.
- Tips for Use: Use sparingly and always combine with a starch like tapioca to balance the texture and prevent dryness.
3. Cassava Flour
Derived from the cassava root, cassava flour is one of the closest substitutes for wheat flour in terms of texture and taste:
- Texture: Creates a smooth, even coating with a neutral flavor.
- Benefits: Lectin-free, grain-free, and gluten-free, it’s an excellent all-purpose option.
- Tips for Use: Use cassava flour as a 1:1 substitute for wheat flour in most recipes. Combine with a liquid such as sparkling water for a light and airy batter.
4. Arrowroot Starch or Tapioca Starch
While technically not flours, arrowroot and tapioca starch are essential components for achieving a light, crispy coating:
- Texture: Provides a smooth, crispy finish when fried or baked.
- Benefits: Both are grain-free and lectin-free, making them ideal for this recipe.
- Tips for Use: Combine with another flour like almond or cassava to ensure a balanced texture. A 50/50 mix often works well.
5. Chickpea Flour (Garbanzo Bean Flour)
For a slightly nutty flavor and robust batter, chickpea flour can be a good choice:
- Texture: Produces a hearty coating with a hint of nuttiness.
- Benefits: Packed with protein and fiber, it’s a nutrient-dense option.
- Tips for Use: While chickpea flour is naturally lectin-free, ensure it’s properly sourced and processed to maintain purity. Combine with spices for added flavor.
6. Sorghum Flour
Sorghum flour is a lesser-known option but works wonderfully in a lectin-free fish batter:
- Texture: Provides a light, flaky coating with a mild flavor.
- Benefits: Rich in antioxidants and gluten-free.
- Tips for Use: Use it in combination with arrowroot or tapioca starch for a more cohesive batter.
7. Mixing Flours for Best Results
No single flour is perfect on its own; the key to a great batter lies in blending flours to achieve the desired texture and flavor:
- Light and Crispy: Combine almond flour with tapioca starch in a 2:1 ratio.
- Dense and Hearty: Mix chickpea flour and cassava flour in equal parts.
- Neutral Flavor: Blend cassava flour with arrowroot starch for a mild, crispy coating.
8. Flour-Free Coating Alternatives
For those who want to avoid flours altogether, there are other ways to achieve a crispy coating:
- Crushed Nuts: Almonds or pecans ground into a coarse texture can create a unique, crunchy batter.
- Shredded Coconut: Provides a crispy, slightly sweet coating, perfect for tropical flavor profiles.
- Ground Pork Rinds: A low-carb, high-protein alternative that crisps beautifully when fried.
Why Experimenting Is Worth It
Choosing different flours not only accommodates dietary restrictions but also allows you to customize the flavor and texture of your fish and chips. Whether you prefer a nutty crunch from almond flour or the smooth, neutral coating of cassava flour, the possibilities are endless.
With the right flour or combination, your lectin-free fish and chips recipe will stand out as a delicious, healthy alternative to the traditional dish. Don’t be afraid to experiment to find the perfect balance for your taste buds!
3. Is This Recipe Paleo or Keto-Friendly?
This lectin-free fish and chips recipe is designed with dietary flexibility in mind and can easily fit into both paleo and keto lifestyles. By carefully selecting ingredients and preparation methods, the recipe maintains its wholesome appeal while adhering to the guidelines of these popular diets. Let’s break down how this recipe aligns with each lifestyle and offer tips to ensure compatibility.
1. Is This Recipe Paleo-Friendly?
The paleo diet, also known as the “caveman diet,” emphasizes eating whole, unprocessed foods that our ancestors might have consumed. The core principles of paleo exclude grains, legumes, refined sugars, and processed oils, making it inherently close to a lectin-free lifestyle.
How This Recipe Aligns with Paleo
- Grain-Free Flours: The use of almond flour, cassava flour, or coconut flour instead of wheat flour ensures the batter is grain-free.
- Lectin-Free Chips: By substituting traditional white potatoes with sweet potatoes or yuca, this recipe remains paleo-compliant.
- Healthy Oils: Avocado oil and coconut oil, which are staples of the paleo diet, are used for frying, avoiding processed vegetable oils.
- Natural Seasonings: The recipe relies on spices and herbs without additives or artificial ingredients.
Paleo Tips
- Ensure all ingredients, such as flours and spices, are free of preservatives and additives.
- Serve with paleo-approved dips like guacamole, homemade ketchup, or garlic aioli made with avocado oil.
2. Is This Recipe Keto-Friendly?
The keto diet, or ketogenic diet, is a low-carb, high-fat plan designed to promote ketosis, where the body burns fat for energy instead of carbohydrates. To be keto-compliant, foods must be very low in carbs while providing sufficient healthy fats and moderate protein.
How This Recipe Aligns with Keto
- Low-Carb Flours: Almond flour and coconut flour are excellent low-carb options used in the batter.
- Chips Alternatives: Instead of carb-heavy potatoes, keto-friendly options like zucchini fries or turnip chips can be used.
- High-Fat Ingredients: The use of avocado oil or ghee for frying adds healthy fats, supporting ketosis.
- Protein from Fish: The fish itself provides a good source of lean protein, essential for the keto diet.
Keto Adjustments
- Choose zucchini fries or baked cauliflower as side dishes to further reduce carbohydrate content.
- Add extra fat through toppings, such as a drizzle of melted ghee or a dollop of keto-friendly tartar sauce.
3. Key Adjustments for Dual Compatibility
To ensure the recipe works for both paleo and keto lifestyles:
- Batter Choices: Use almond flour as the base, as it fits both diets, and combine it with a small amount of arrowroot starch for texture.
- Chips Variations: Sweet potatoes work for paleo but not keto. Opt for zucchini or turnips for a keto-friendly option.
- Oil Selection: Stick to avocado oil or coconut oil, as these are staples in both diets.
- Flavor Enhancements: Avoid adding any sweeteners or sugar-laden condiments. Use fresh herbs, lemon juice, and spices for flavor.
4. Why This Recipe Works for Both Diets
This recipe’s adaptability makes it ideal for households with varied dietary preferences. By focusing on whole, natural ingredients and avoiding grains, legumes, and refined oils, it inherently meets paleo guidelines. Simultaneously, the low-carb nature of the batter and chips alternatives allows for seamless integration into a keto meal plan.
5. Customization Ideas
Here are a few ways to make the recipe even more suitable for your chosen diet:
For Paleo
- Add a side of sautéed greens or roasted vegetables for a nutrient-packed accompaniment.
- Make a dipping sauce with coconut cream, garlic, and fresh herbs.
For Keto
- Pair with a creamy, high-fat sauce like garlic butter or blue cheese dressing.
- Serve with a side of avocado slices or a simple cucumber salad.
Final Thoughts
This lectin-free fish and chips recipe is highly versatile, making it an excellent choice for both paleo and keto dieters. By understanding the principles of each diet and making simple ingredient adjustments, you can enjoy this classic comfort food without compromising your health goals. Whether you’re focused on reducing carbs or eliminating grains, this recipe proves that dietary restrictions don’t have to mean giving up your favorite meals.
4. How Can I Store Leftovers?
Storing leftovers from your lectin-free fish and chips recipe is simple and ensures that you can enjoy this delicious meal later without compromising its flavor or texture. Proper storage methods can help maintain the crispness of the fish and chips and keep them safe for consumption. Here’s a comprehensive guide to storing, reheating, and maximizing the freshness of your leftovers.
1. Cooling Down the Leftovers
Before storing, it’s essential to let the fish and chips cool to room temperature.
- Why Cool Down? Storing hot food can create condensation inside the container, leading to soggy textures and bacterial growth.
- How to Cool Properly: Place the fish and chips on a wire rack to allow air circulation, ensuring even cooling. Avoid leaving them out for more than 2 hours to prevent contamination.
2. Choosing the Right Storage Container
The type of container you use can significantly impact the quality of your leftovers.
- For the Fish:
- Use an airtight container to retain freshness and prevent odors from escaping.
- Separate layers of fish fillets with parchment paper to prevent them from sticking together.
- For the Chips:
- Store in a paper bag or a container lined with a paper towel to help absorb excess moisture and preserve crispness.
- Avoid plastic bags, as they trap moisture and can make the chips soggy.
3. Refrigeration Tips
Both the fish and chips can be safely stored in the refrigerator for up to 3 days.
- Temperature: Ensure your refrigerator is set to 40°F (4°C) or lower.
- Placement: Store the fish and chips in separate containers to prevent the chips from absorbing any fishy odors.
4. Freezing Leftovers
If you want to store leftovers for a longer period, freezing is a great option:
- For the Fish:
- Wrap each fish fillet individually in plastic wrap or aluminum foil, then place them in a freezer-safe bag or container.
- Label the container with the date to keep track of freshness.
- For the Chips:
- Flash freeze the chips by spreading them on a baking sheet and freezing them for 1–2 hours. Once frozen, transfer them to a freezer-safe bag. This prevents them from clumping together.
- Shelf Life: Frozen fish and chips can be stored for up to 2 months.
5. Reheating Leftovers
Reheating properly is the key to reviving the crispy texture and delicious flavor of your fish and chips.
For the Fish
- In the Oven or Air Fryer:
- Preheat the oven or air fryer to 375°F (190°C).
- Place the fish on a wire rack or parchment-lined tray to allow airflow.
- Heat for 8–10 minutes or until the coating is crispy and the fish is warmed through.
- Avoid the Microwave: Microwaving can make the batter soggy and ruin the texture.
For the Chips
- In the Oven or Air Fryer:
- Preheat to 400°F (200°C).
- Spread the chips in a single layer on a baking tray or in the air fryer basket.
- Heat for 5–7 minutes, shaking the tray halfway through to ensure even crisping.
- Pro Tip: Add a light drizzle of oil before reheating to restore their crispness.
6. Making the Most of Leftovers
If you’d like to repurpose your leftovers into a new dish, here are some ideas:
- Fish Tacos: Flake the fish and use it as a filling for lettuce wraps or grain-free tortillas. Add fresh salsa, avocado, and a squeeze of lime.
- Loaded Chips: Turn the chips into a lectin-free “loaded fries” dish by topping them with shredded cheese, cooked vegetables, and a dollop of sour cream.
- Fish Salad: Break the fish into chunks and toss it into a green salad with olive oil and balsamic dressing for a lighter meal.
7. Key Tips for Optimal Storage
- Always store leftovers promptly to maintain food safety and freshness.
- Use high-quality containers or wraps to prevent air exposure, which can cause freezer burn or spoilage.
- Avoid reheating multiple times, as this can dry out the fish and chips and diminish their flavor.
Final Thoughts
Proper storage ensures that your lectin-free fish and chips remain delicious and satisfying even days later. Whether you’re planning to reheat them as-is or transform them into a creative new dish, these tips will help you make the most of your leftovers while maintaining their taste and texture. Enjoy every bite, even the second (or third) time around!
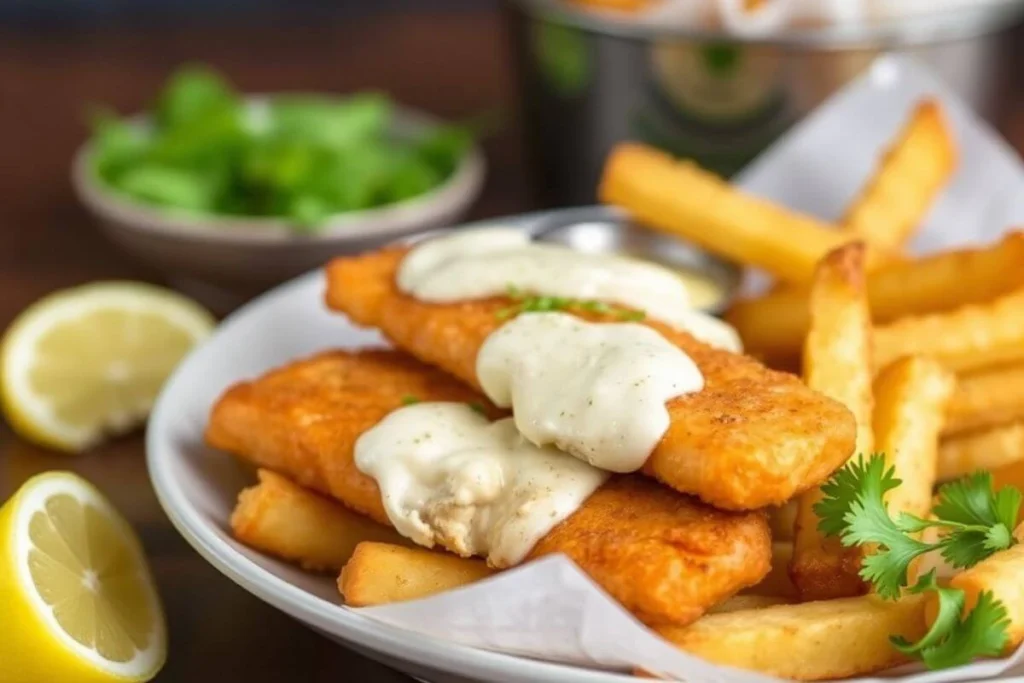
The lectin-free fish and chips recipe is a perfect example of how classic comfort food can be transformed into a healthier, more nourishing dish without sacrificing flavor. By using wholesome, lectin-free ingredients like alternative flours, healthy oils, and nutrient-rich sides, this recipe offers a guilt-free indulgence that fits seamlessly into a variety of diets, including paleo and keto.
From crispy-coated fish to perfectly cooked chips, each bite is a testament to the versatility of simple, clean ingredients. Whether you’re avoiding lectins for health reasons or just looking for a creative twist on a traditional favorite, this recipe is sure to become a go-to option for family meals or special occasions.
As you savor this delicious dish, you’ll not only enjoy its incredible taste but also the peace of mind that comes with knowing you’re making a better choice for your body. So, gather your ingredients, try out the tips and techniques shared, and treat yourself to a plate of lectin-free fish and chips: a healthier twist on a timeless classic!